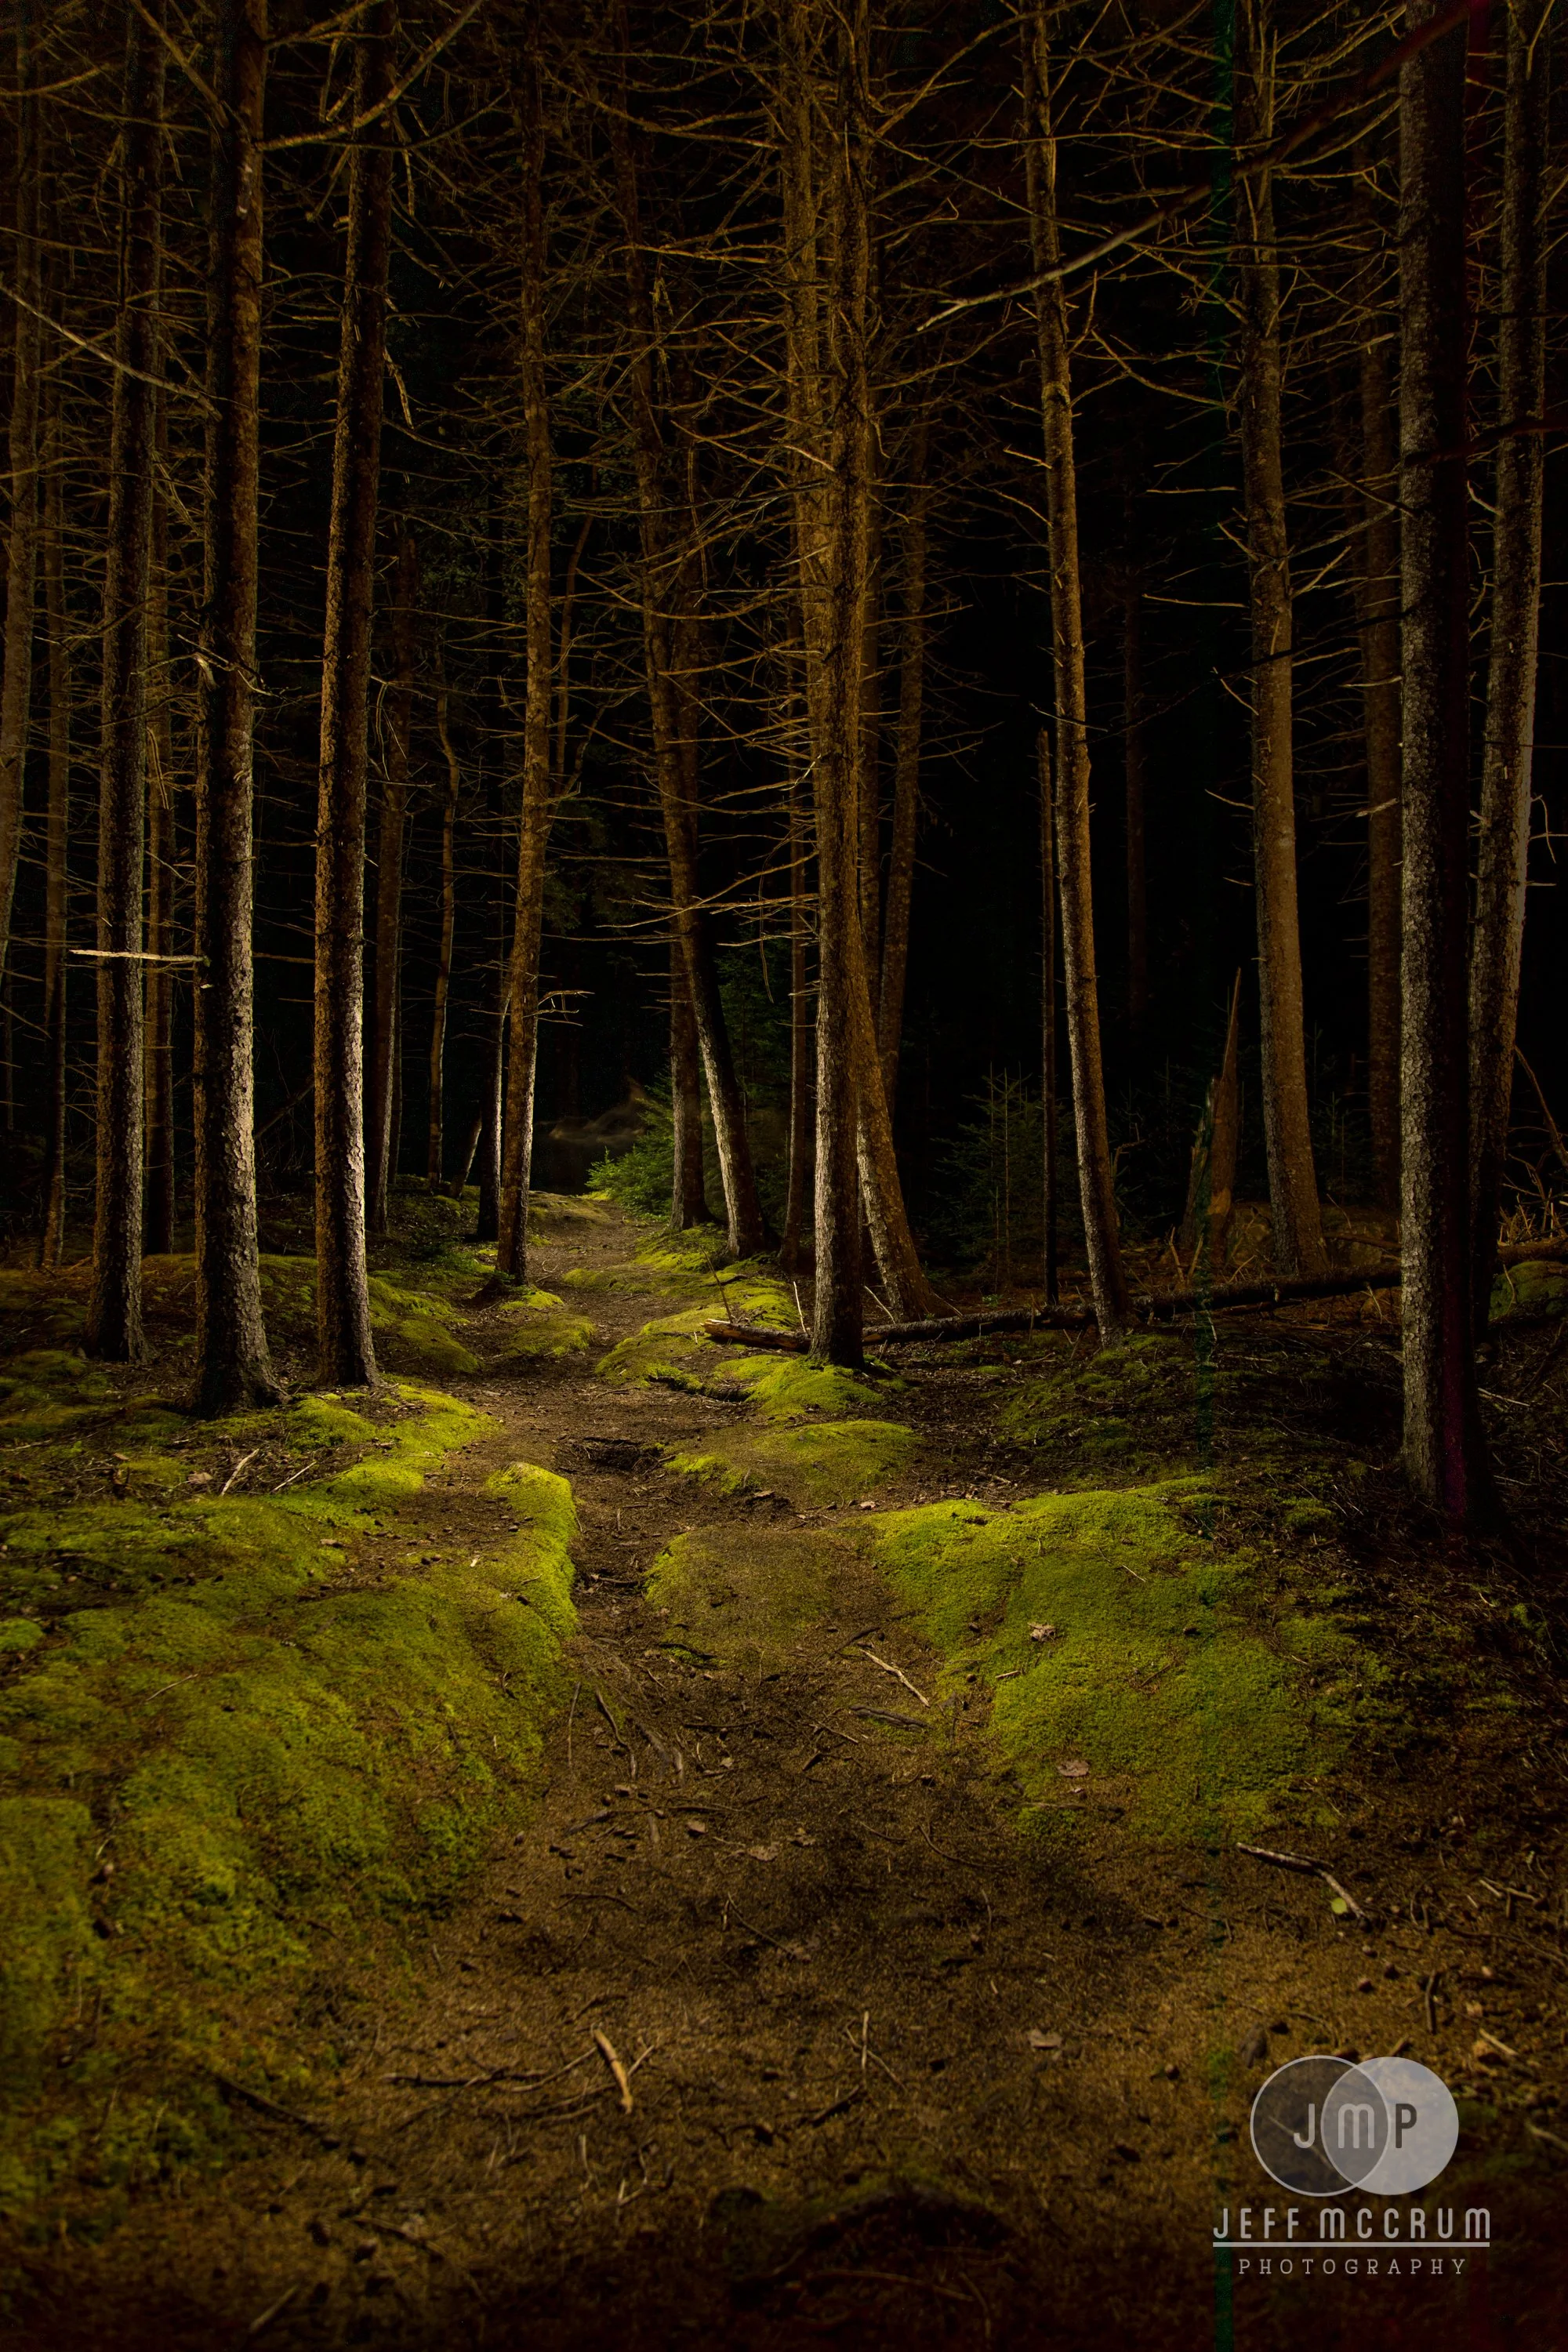
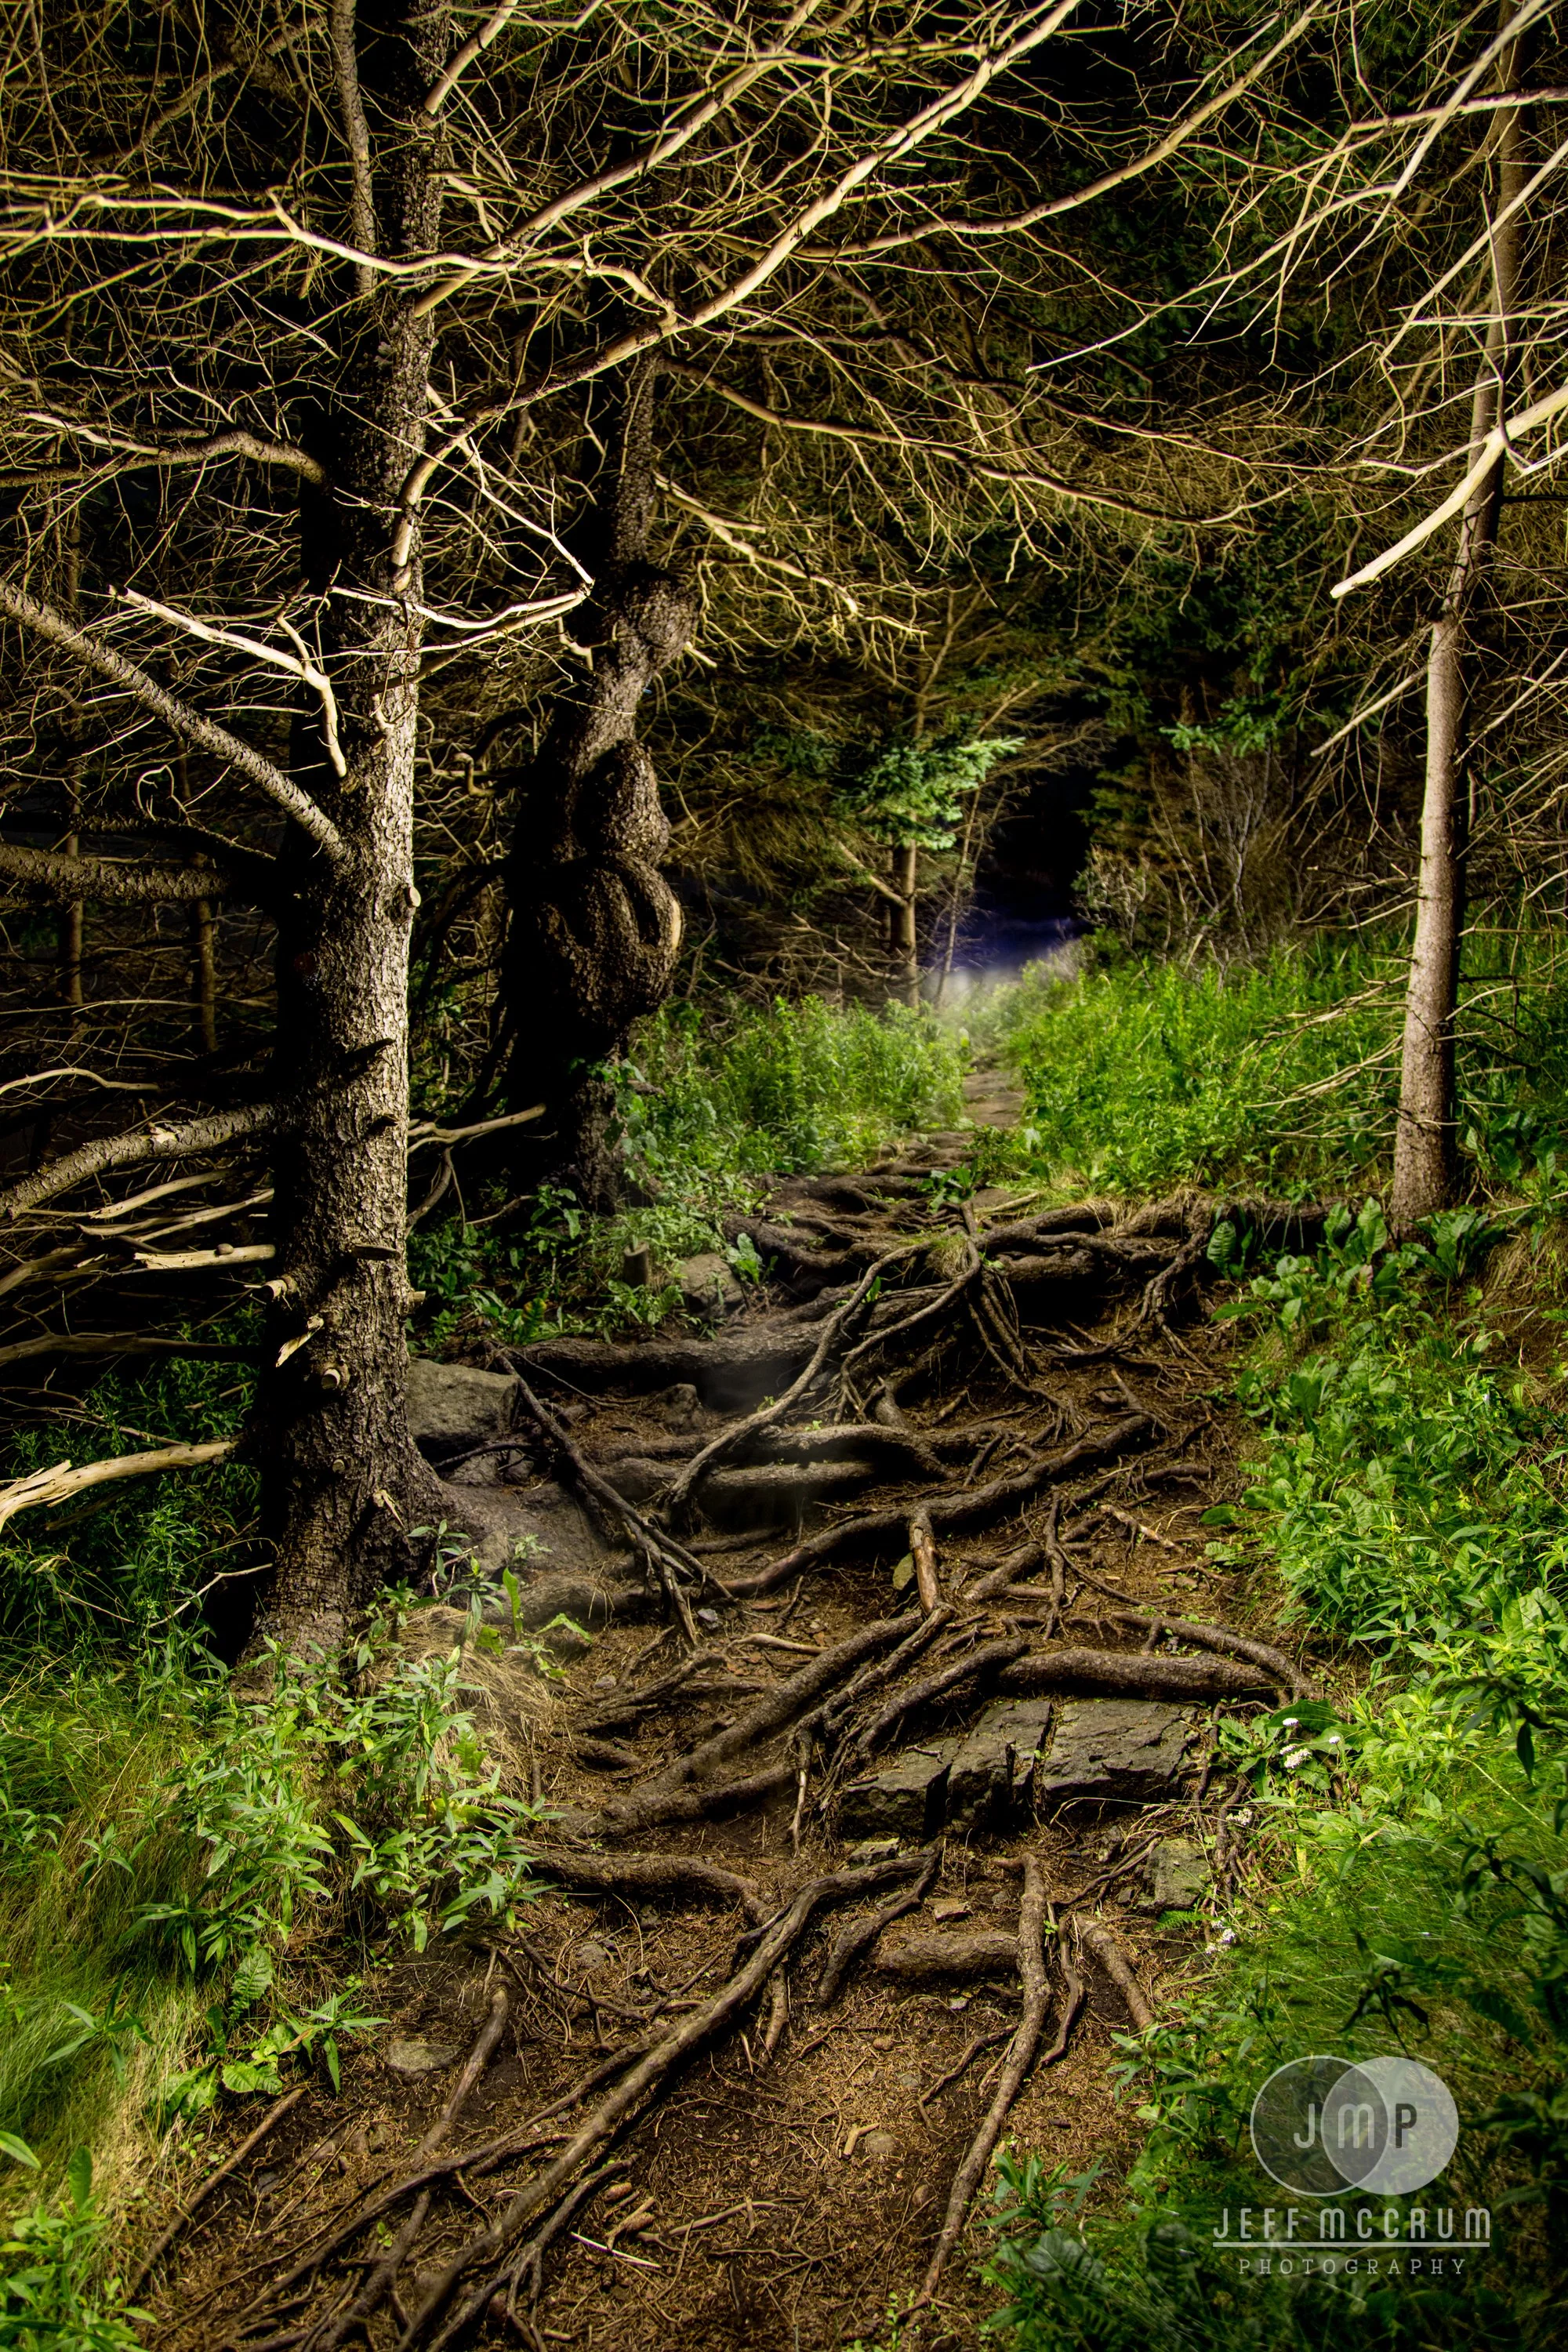
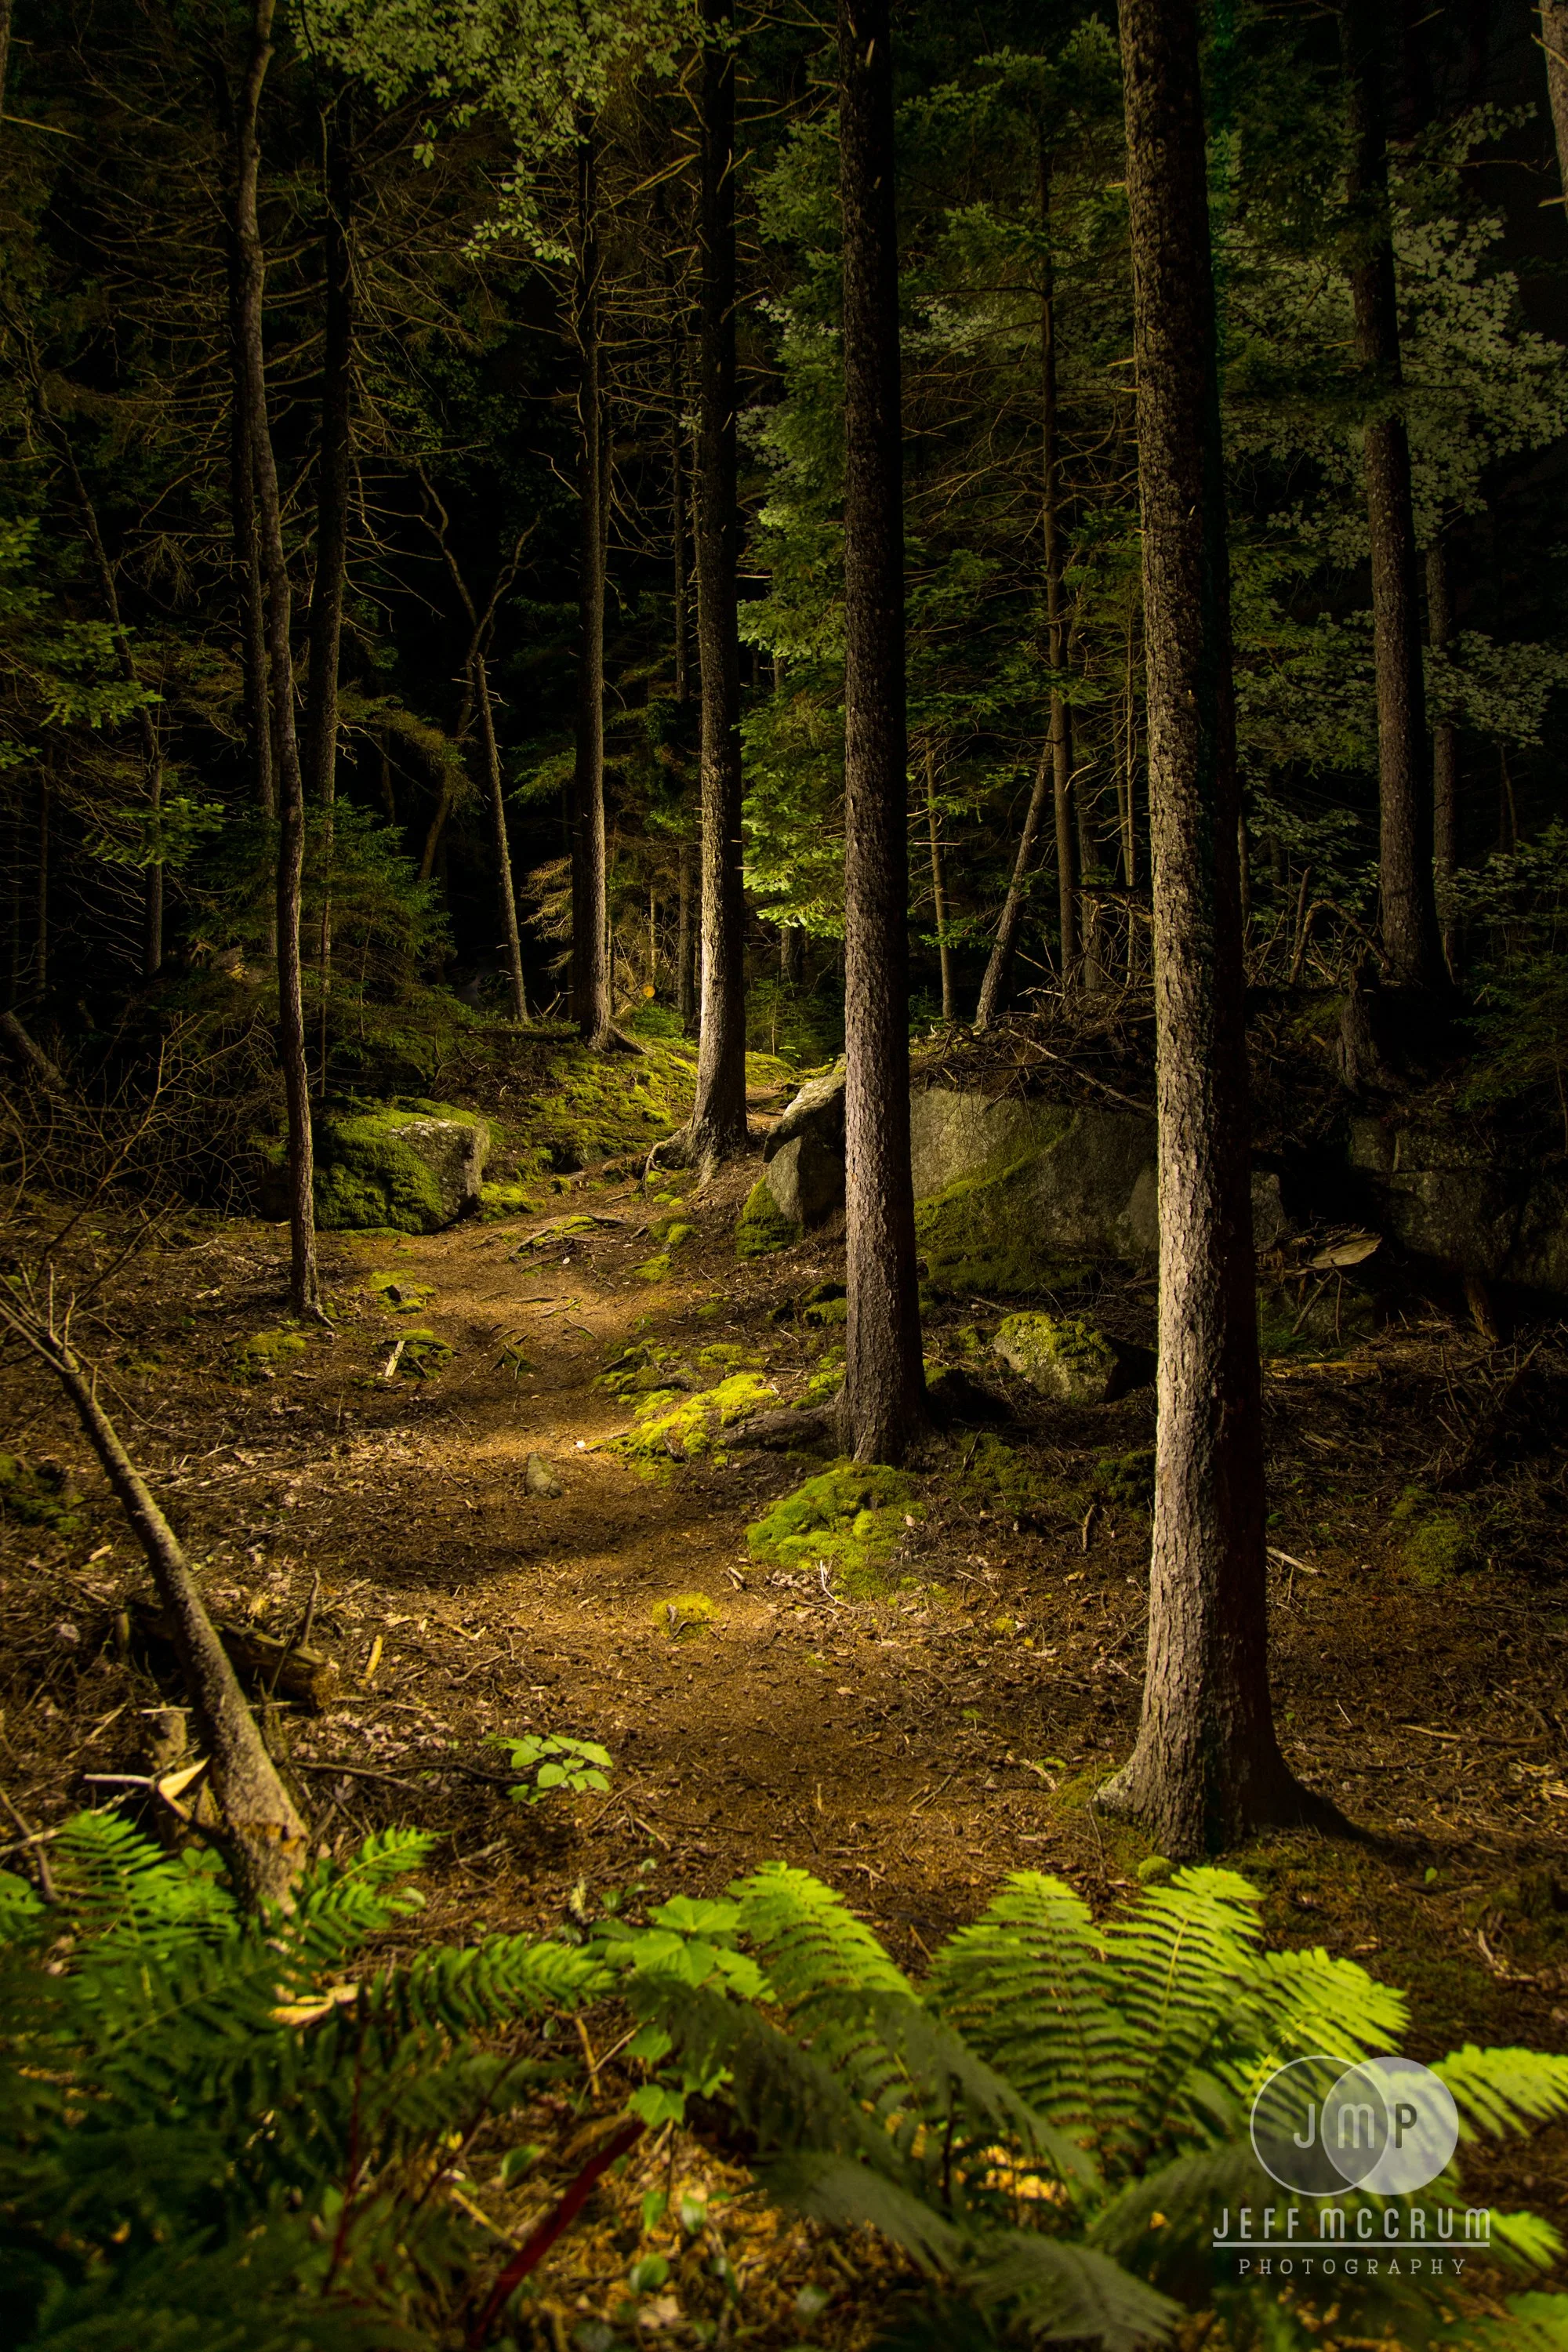
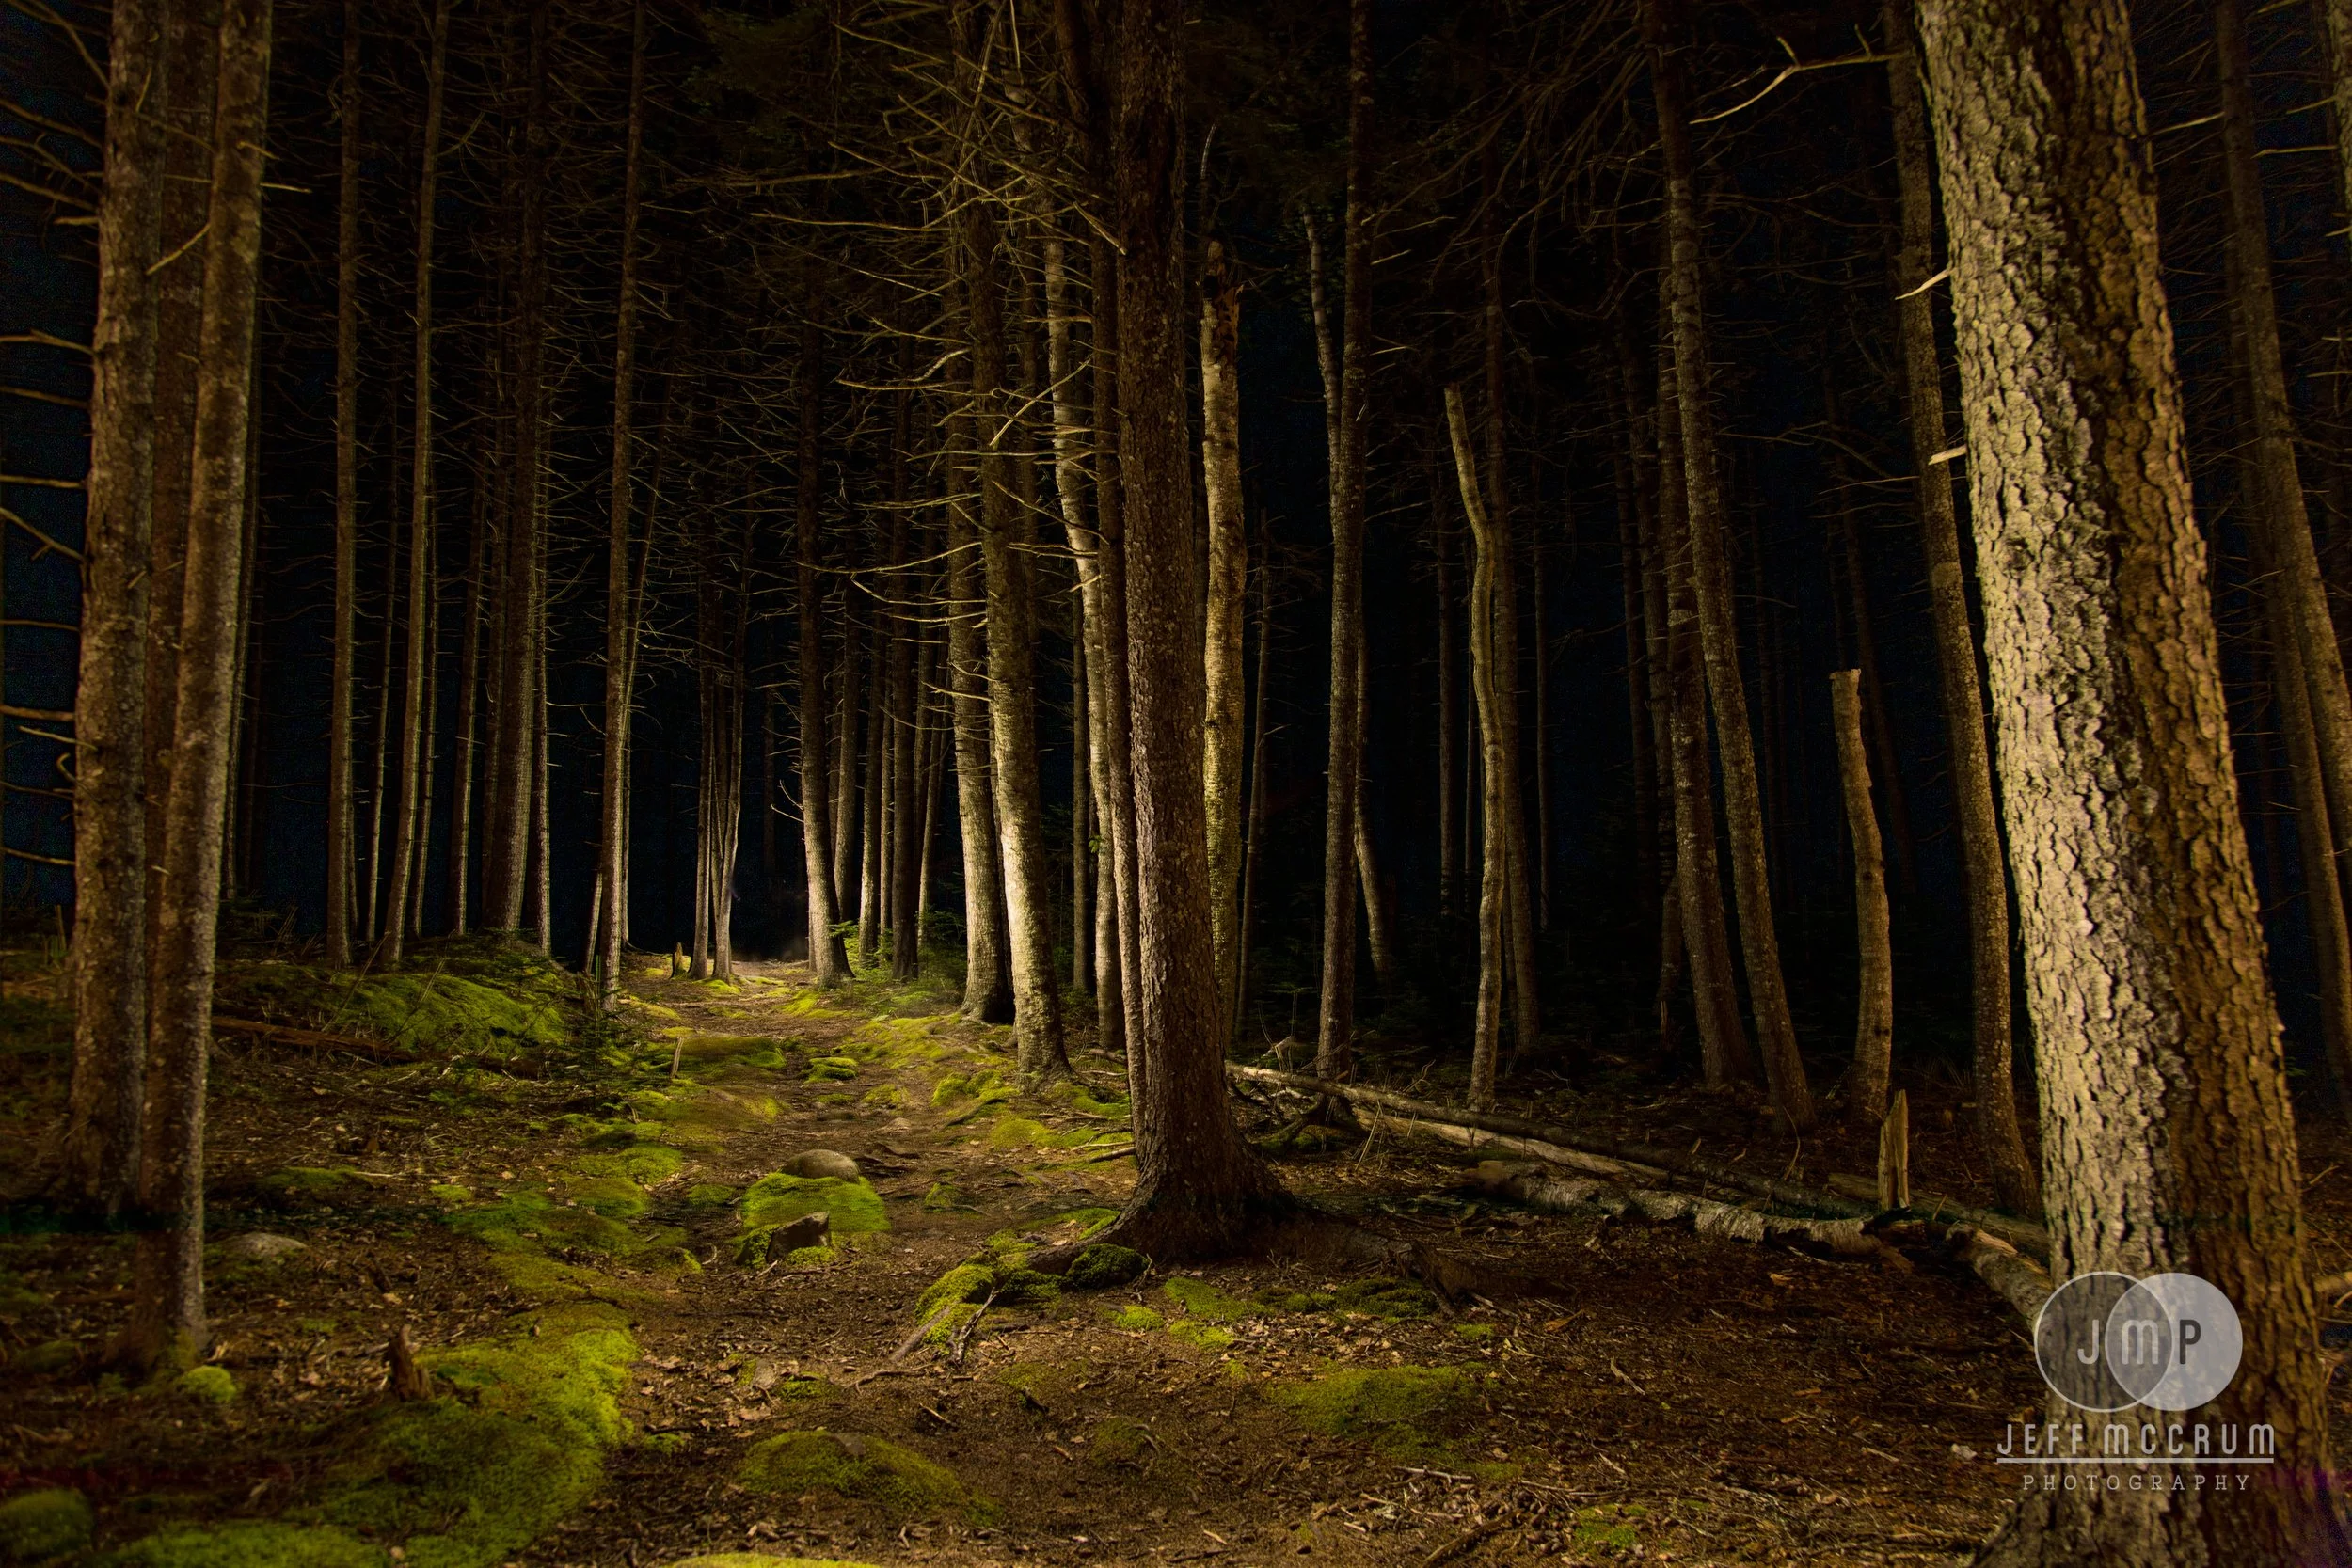
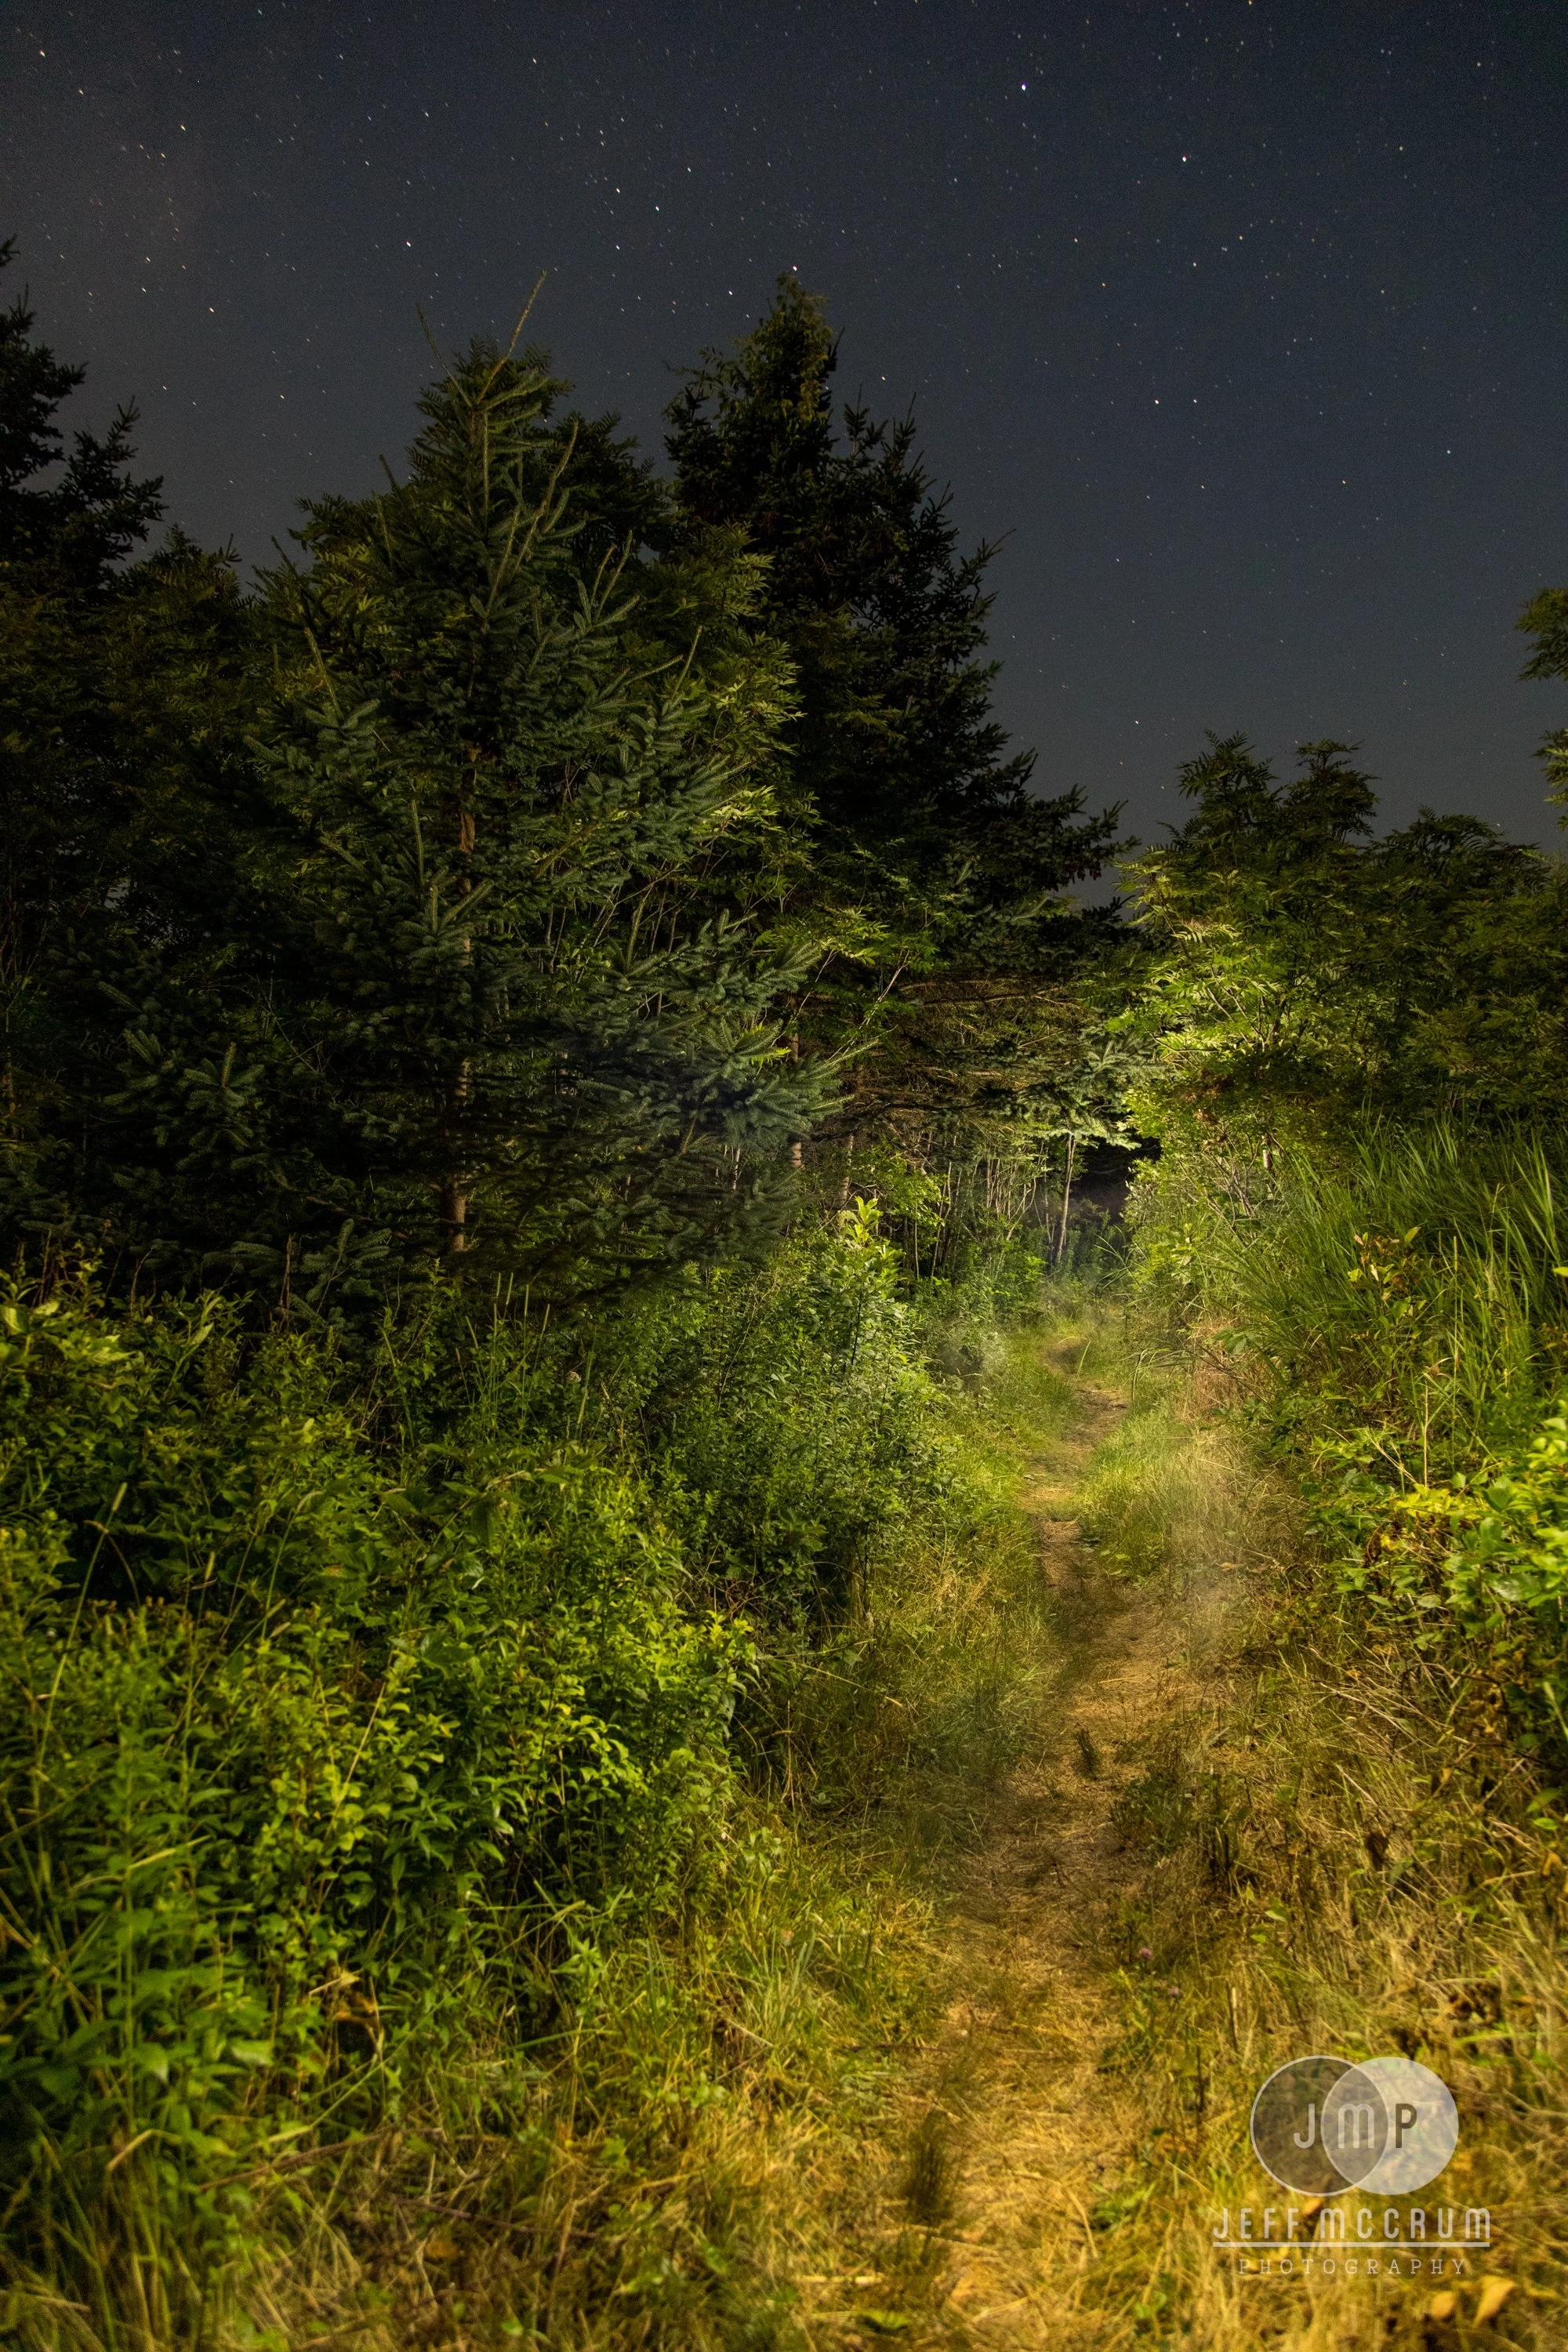
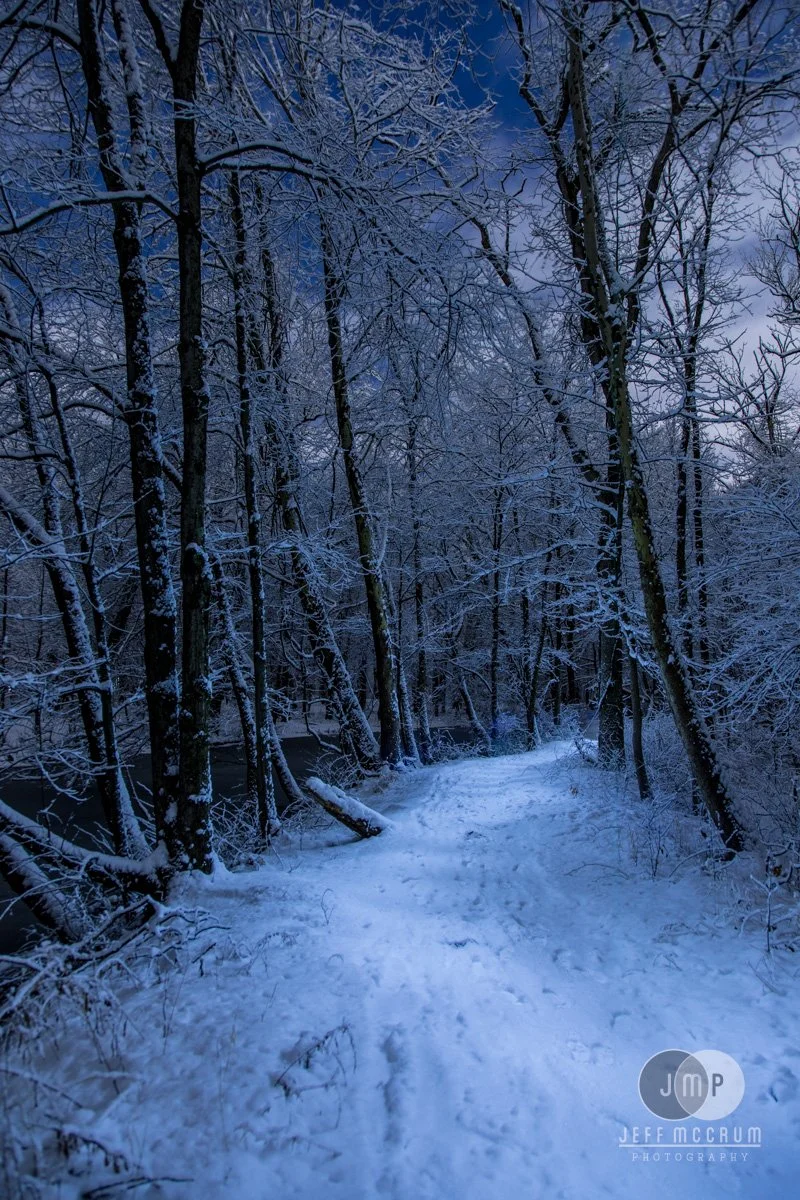
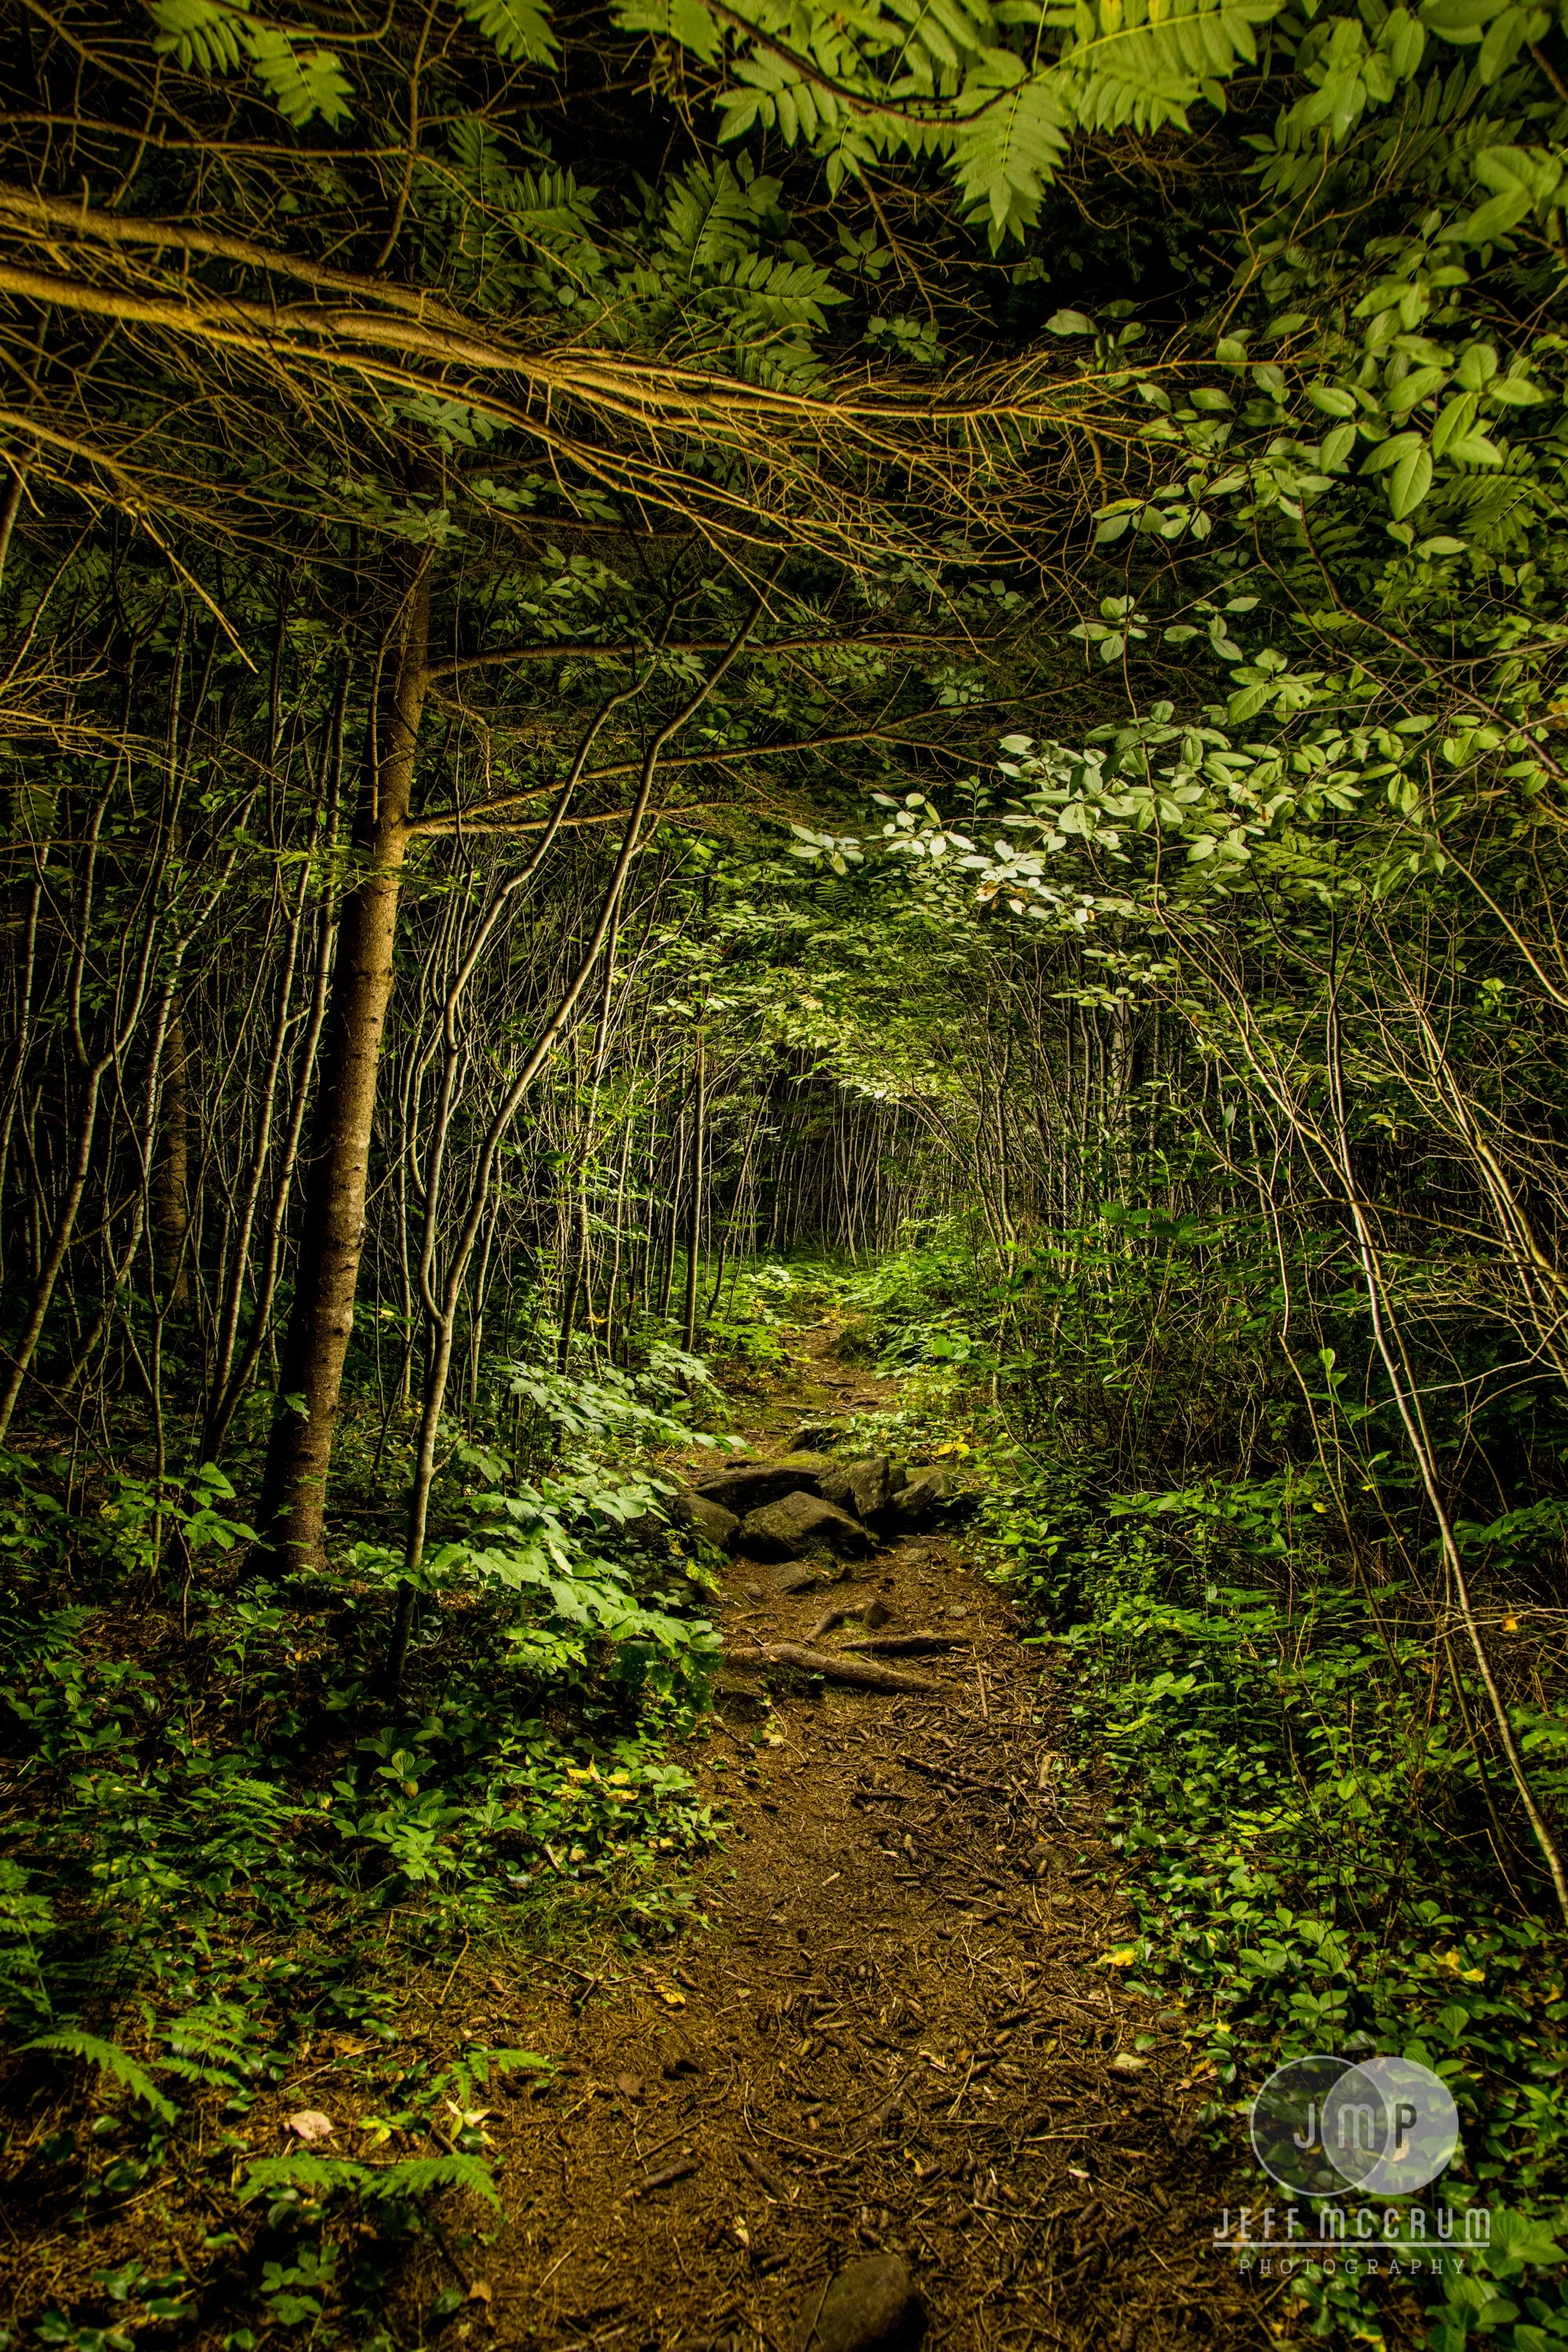
Backlight is magic, as the saying goes, the trick has always about how to hide the source. This concept consists of two cones, nestled inside each other, attached to a flashlight. The smaller outer cone limits the light from going back towards the person holding the flashlight and the larger cone in the front directs the light sideways instead of forward towards the camera.
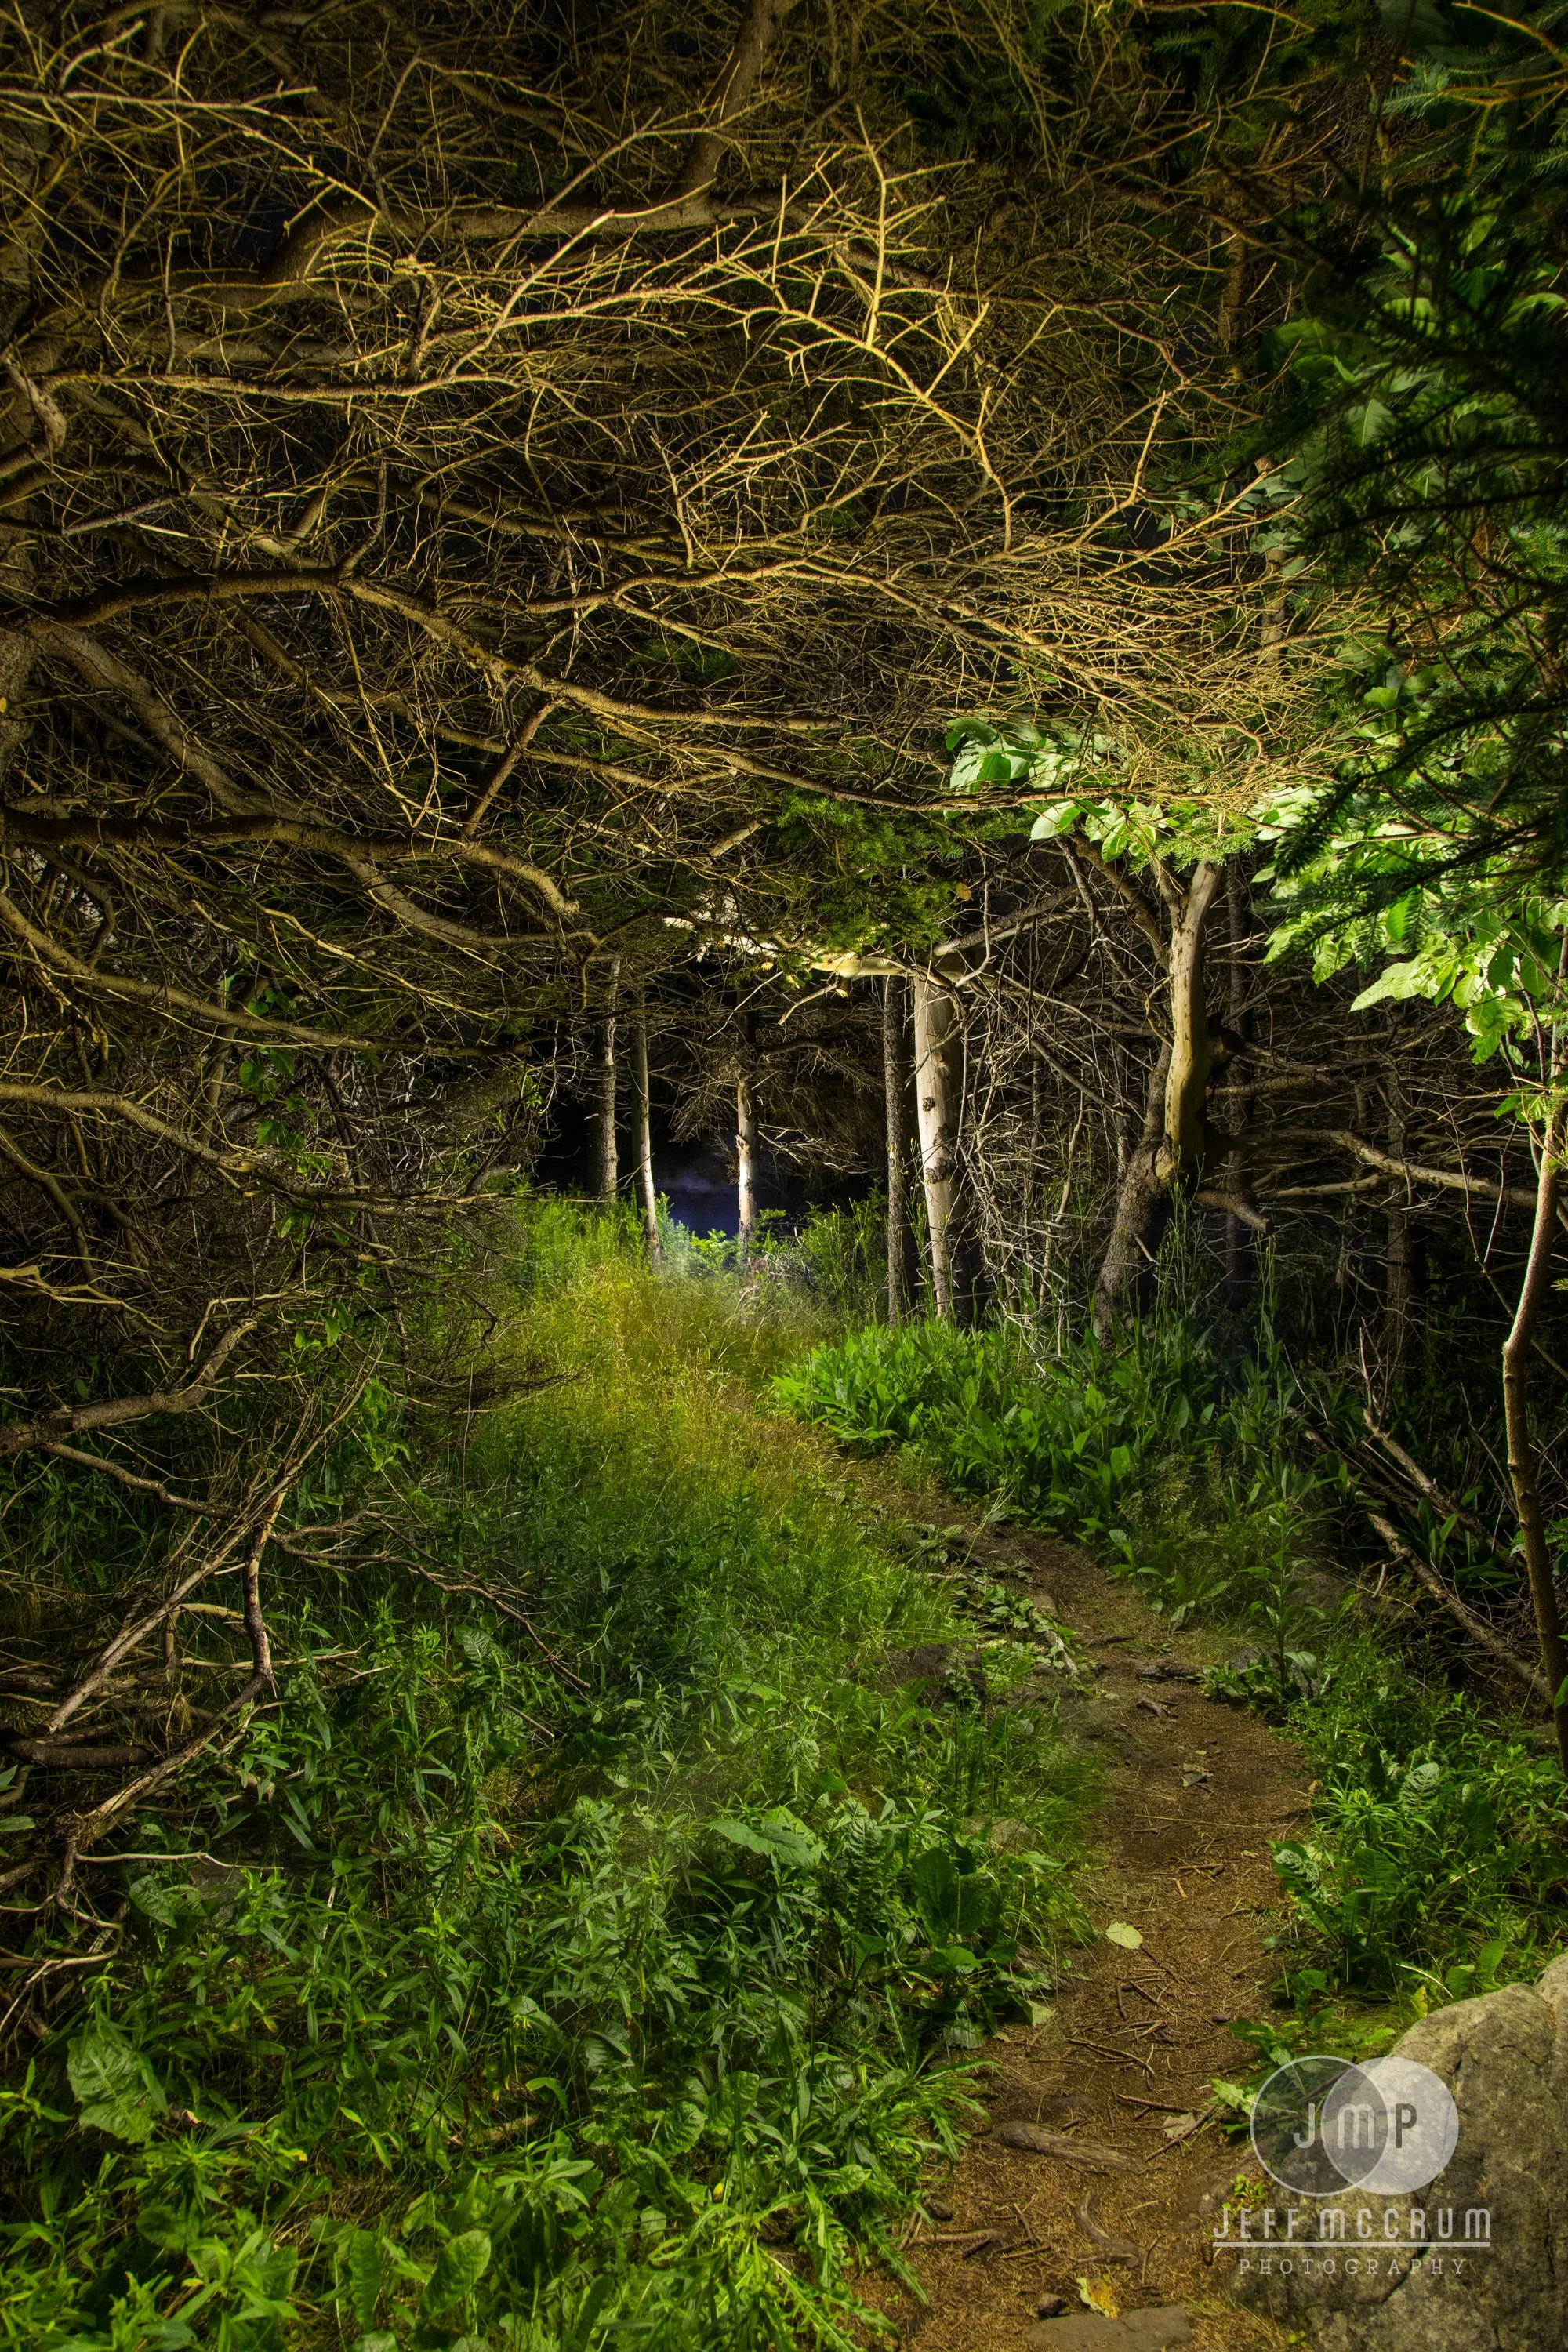
The resulting ring of light can illuminate the scene with backlight without shining into the camera, providing a magical light source evenly illuminating the scene from the center out. The result can best be described in images and video but it certainly is breathtaking. I find it to be an amazing tool for cloudy nights and I want to light paint natural trails or other dark spaces when the stars or moon are going to be of no help to the scene. It is most visible in darker spaces but this also depends on the brightness of your light.
Originally created by Pala Teth, an amazing Belgian light painter whose work you should check out, I have enjoyed using a 3D printed one for several years. However, one of the main drawbacks has been the size, it takes up a lot of room in a camera bag. Therefore one of the main driving forces of my revision was to find a way to make it more compact. The answer comes in making the top of the shield cone removable, allowing the pieces to nest into one another, greatly reducing the overall size to just the outer cone.
But that change was only the beginning! I am a big fan of the Coast TX11R flashlight and wanted to create a rigid connection between the light and the scanner, so there is a bayonet-style connection that twists and locks into place. I also recognize not everyone has this flashlight, so the 38 mm opening is also sized to attach a light painting Universal Connector allowing for use with nearly any flashlight. Further rigid connections are achieved with the included inserts for any flashlight sized for 33.5 mm, 30.5 mm, and 25.5.mm outer diameters..
Other improvements include:
- Use of stronger, more robust carbon fiber reinforced PETG (Polyethylene terephthalate glycol) with an abrasion resistant matte surface
- Redesigned and revised cones resulting in smoother shapes with no sanding required
- Reduction in the size of the vertical standoffs for smaller shadow lines
- Vinyl wraps for increased reflective efficiency and consistency
- Improved nested connection between the cones for a more stable fit to limit misalignment or accidental shearing
- Compatible with flashlights 38mm, 33.5mm, 30.5mm, 25.5mm and the Universal Connector
All contained in a convenient black mesh bag for easy travel and organization! Built in the US for shorter shipping times in North America.
How it works:
The Portable Backlight Scanner comes in its bag already separated for easy transport. There are three main parts: the conical cap and threaded bottom shield with the same diffuse finish and the flashlight holder with cone and cylinder.
1 - Screw the conical cap onto the threaded bottom so it is one unit.
2 - Connect your flashlight onto the top flashlight holder, if needed use the converters for your flashlight. They push in and turn to stay connected. The Universal Connector simply pushes in.
3 - Attach the flashlight holder to the bottom shield via the three magnets on posts, this should all be one unit now.
Tips on use:
- Wear as much black clothing as possible, possibly even black gloves,
- Stretch your arms out in front of you,
- Hang a flashlight under your camera tripod to ensure you are aiming the Portable Backlight Scanner at your camera
- Turn off the flashlight about 3-5 feet (1-2 meters) from the camera to avoid accidental capture
Backlight is magic, as the saying goes, the trick has always about how to hide the source. This concept consists of two cones, nestled inside each other, attached to a flashlight. The smaller outer cone limits the light from going back towards the person holding the flashlight and the larger cone in the front directs the light sideways instead of forward towards the camera.
The resulting ring of light can illuminate the scene with backlight without shining into the camera, providing a magical light source evenly illuminating the scene from the center out. The result can best be described in images and video but it certainly is breathtaking. I find it to be an amazing tool for cloudy nights and I want to light paint natural trails or other dark spaces when the stars or moon are going to be of no help to the scene. It is most visible in darker spaces but this also depends on the brightness of your light.
Originally created by Pala Teth, an amazing Belgian light painter whose work you should check out, I have enjoyed using a 3D printed one for several years. However, one of the main drawbacks has been the size, it takes up a lot of room in a camera bag. Therefore one of the main driving forces of my revision was to find a way to make it more compact. The answer comes in making the top of the shield cone removable, allowing the pieces to nest into one another, greatly reducing the overall size to just the outer cone.
But that change was only the beginning! I am a big fan of the Coast TX11R flashlight and wanted to create a rigid connection between the light and the scanner, so there is a bayonet-style connection that twists and locks into place. I also recognize not everyone has this flashlight, so the 38 mm opening is also sized to attach a light painting Universal Connector allowing for use with nearly any flashlight. Further rigid connections are achieved with the included inserts for any flashlight sized for 33.5 mm, 30.5 mm, and 25.5.mm outer diameters..
Other improvements include:
- Use of stronger, more robust carbon fiber reinforced PETG (Polyethylene terephthalate glycol) with an abrasion resistant matte surface
- Redesigned and revised cones resulting in smoother shapes with no sanding required
- Reduction in the size of the vertical standoffs for smaller shadow lines
- Vinyl wraps for increased reflective efficiency and consistency
- Improved nested connection between the cones for a more stable fit to limit misalignment or accidental shearing
- Compatible with flashlights 38mm, 33.5mm, 30.5mm, 25.5mm and the Universal Connector
All contained in a convenient black mesh bag for easy travel and organization! Built in the US for shorter shipping times in North America.
How it works:
The Portable Backlight Scanner comes in its bag already separated for easy transport. There are three main parts: the conical cap and threaded bottom shield with the same diffuse finish and the flashlight holder with cone and cylinder.
1 - Screw the conical cap onto the threaded bottom so it is one unit.
2 - Connect your flashlight onto the top flashlight holder, if needed use the converters for your flashlight. They push in and turn to stay connected. The Universal Connector simply pushes in.
3 - Attach the flashlight holder to the bottom shield via the three magnets on posts, this should all be one unit now.
Tips on use:
- Wear as much black clothing as possible, possibly even black gloves,
- Stretch your arms out in front of you,
- Hang a flashlight under your camera tripod to ensure you are aiming the Portable Backlight Scanner at your camera
- Turn off the flashlight about 3-5 feet (1-2 meters) from the camera to avoid accidental capture
 Image 1 of 12
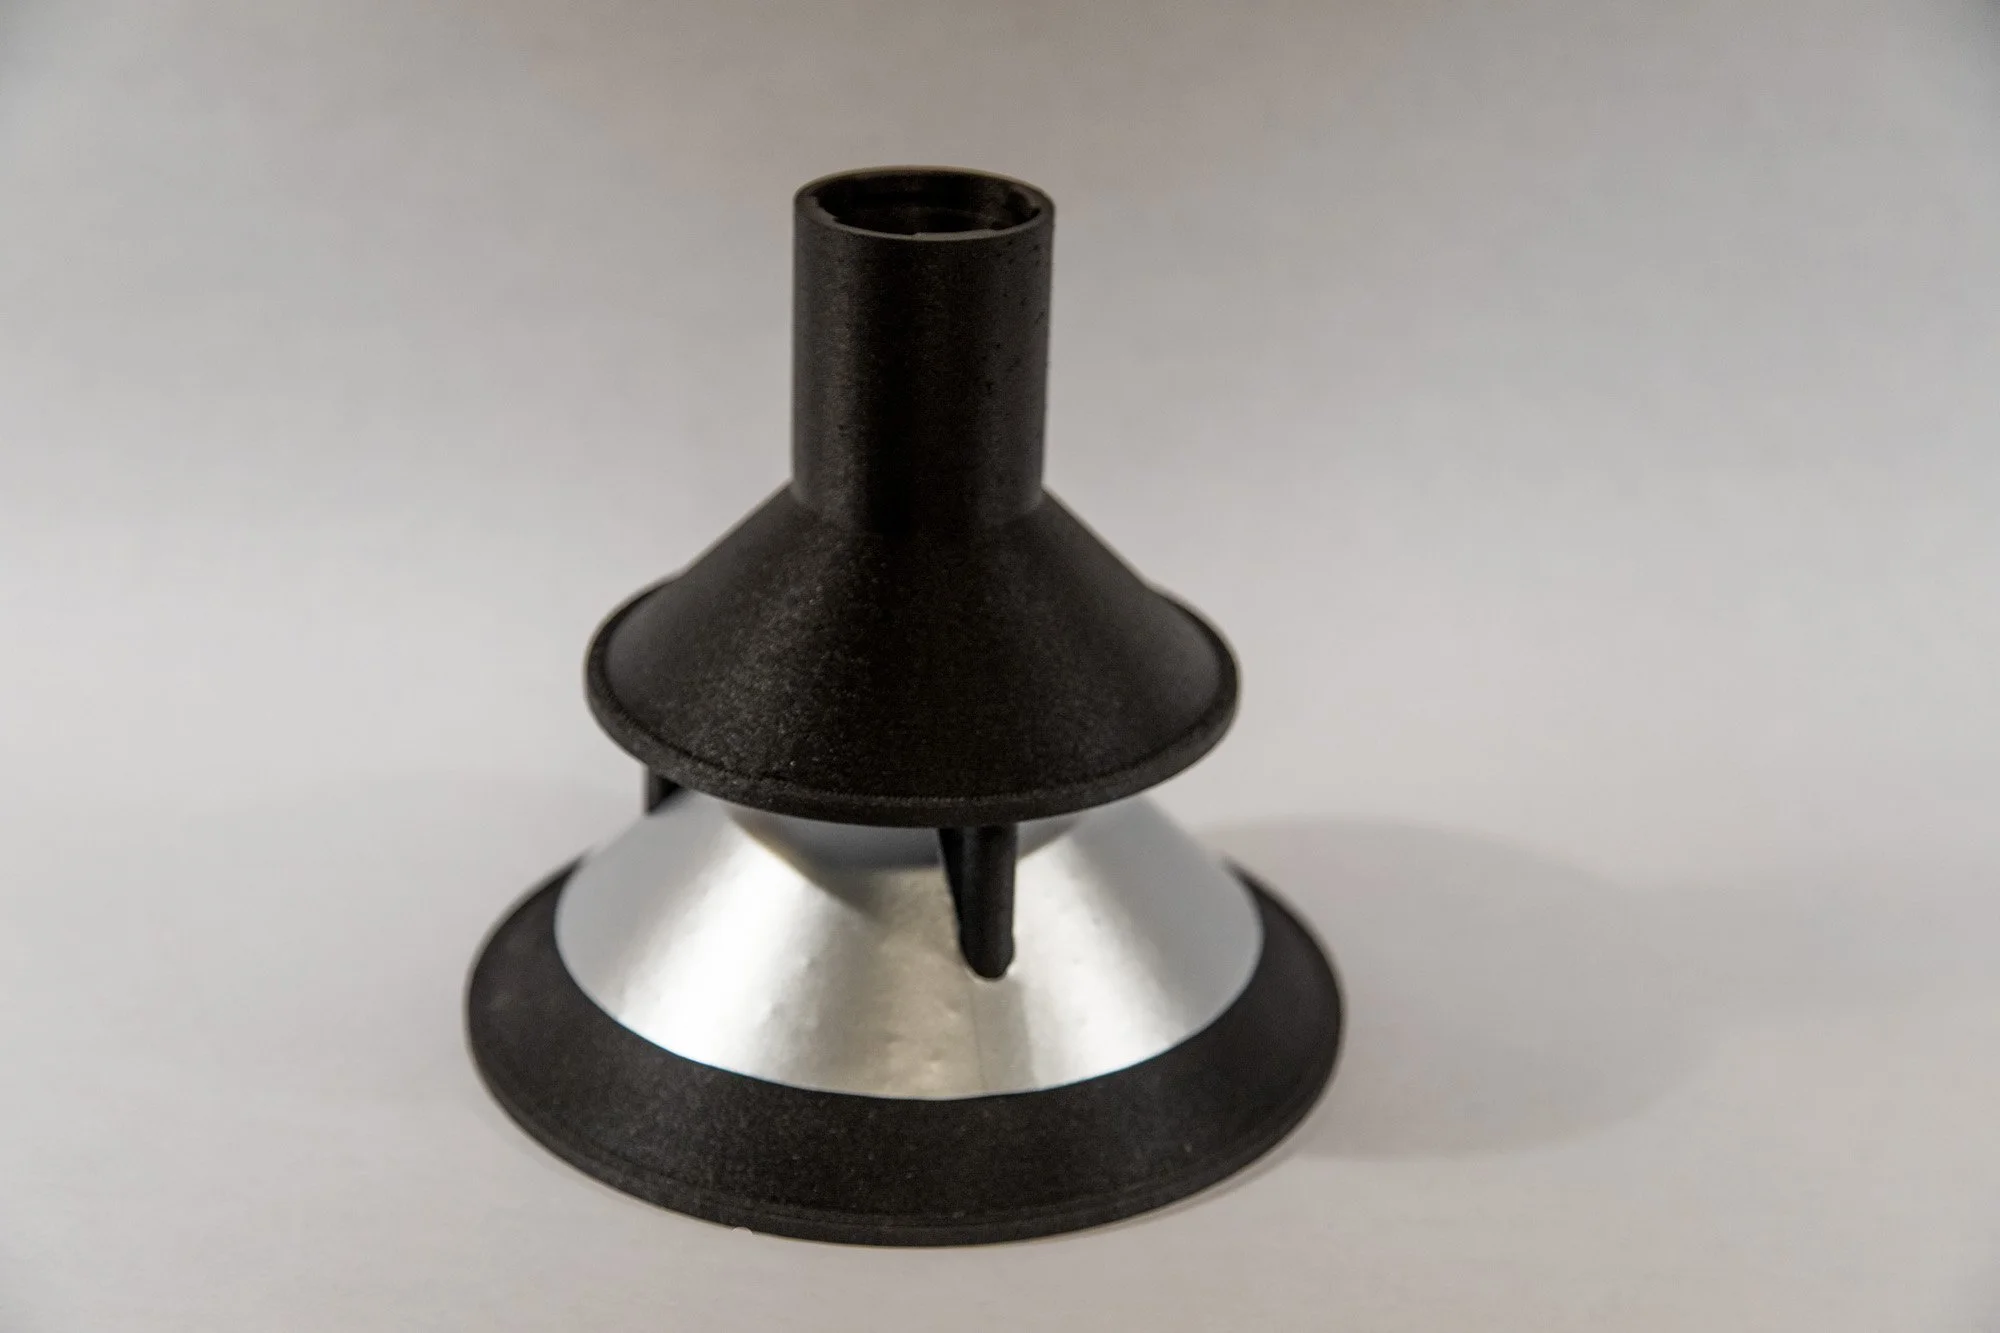 Image 2 of 12
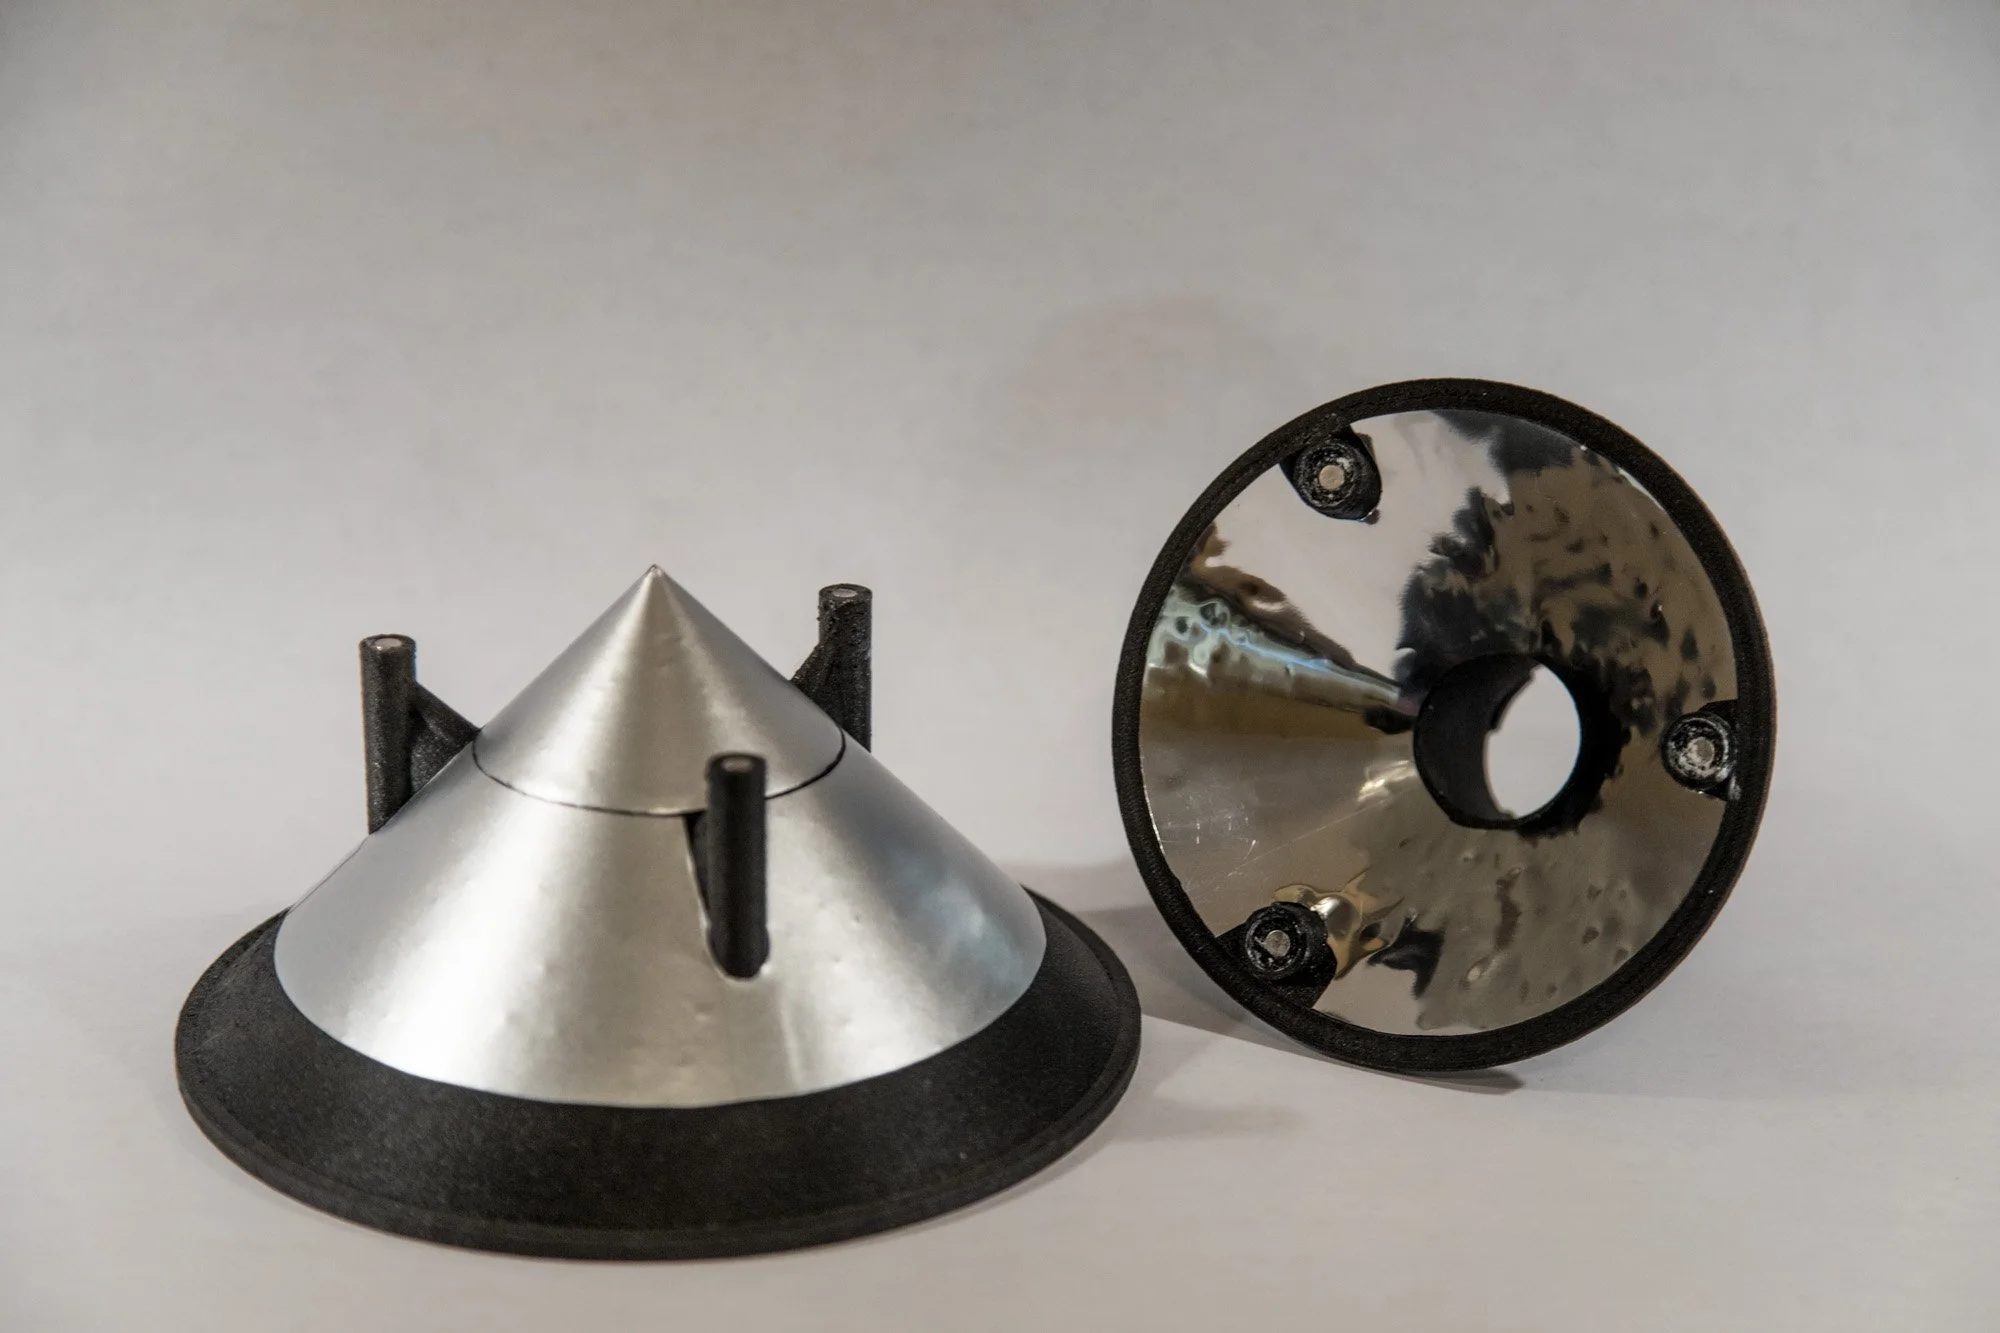 Image 3 of 12
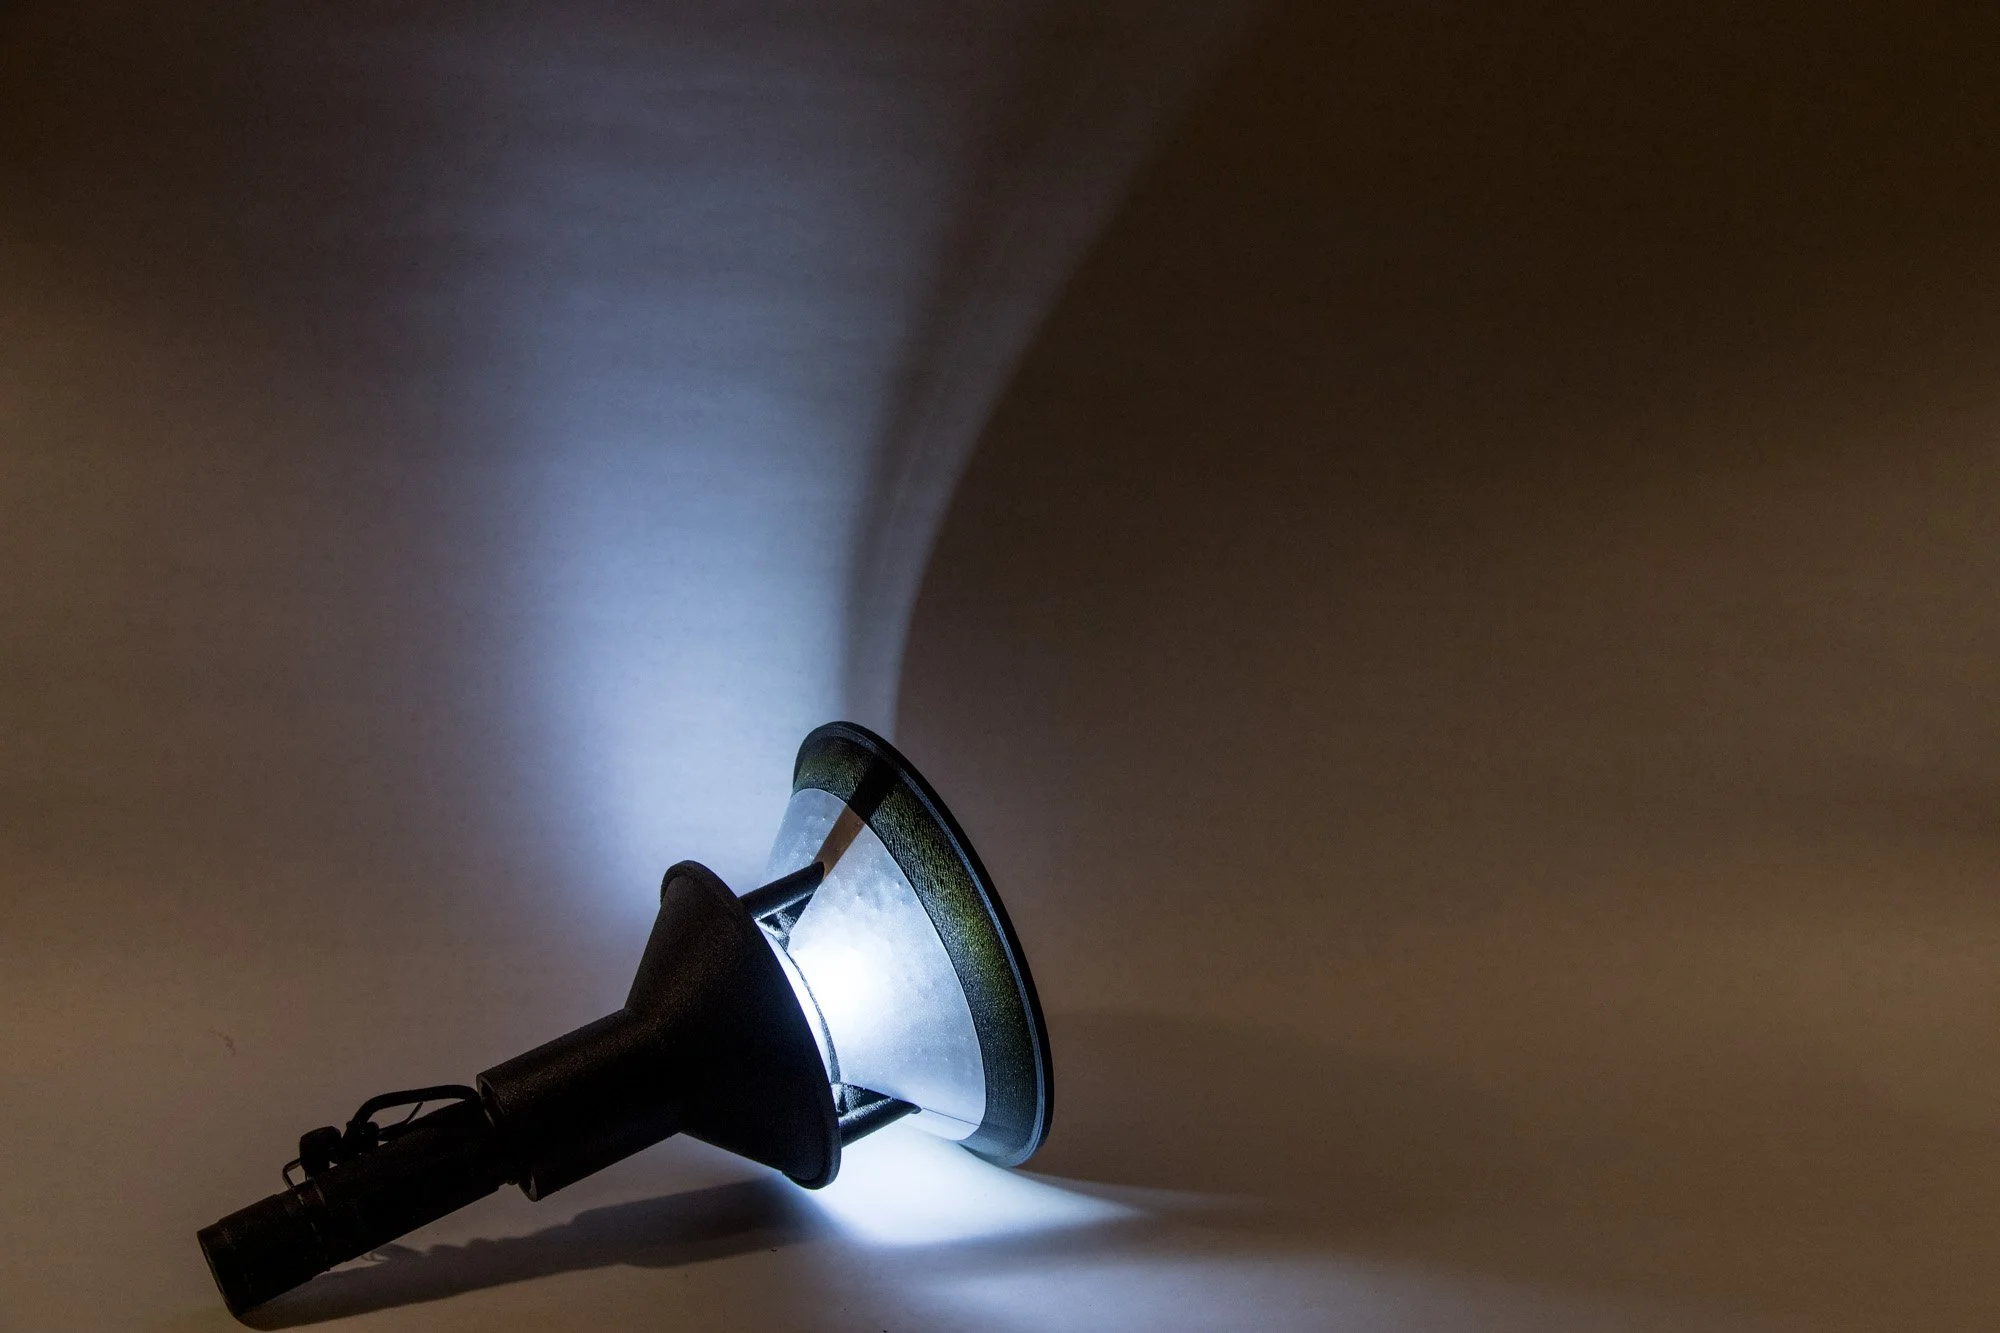 Image 4 of 12
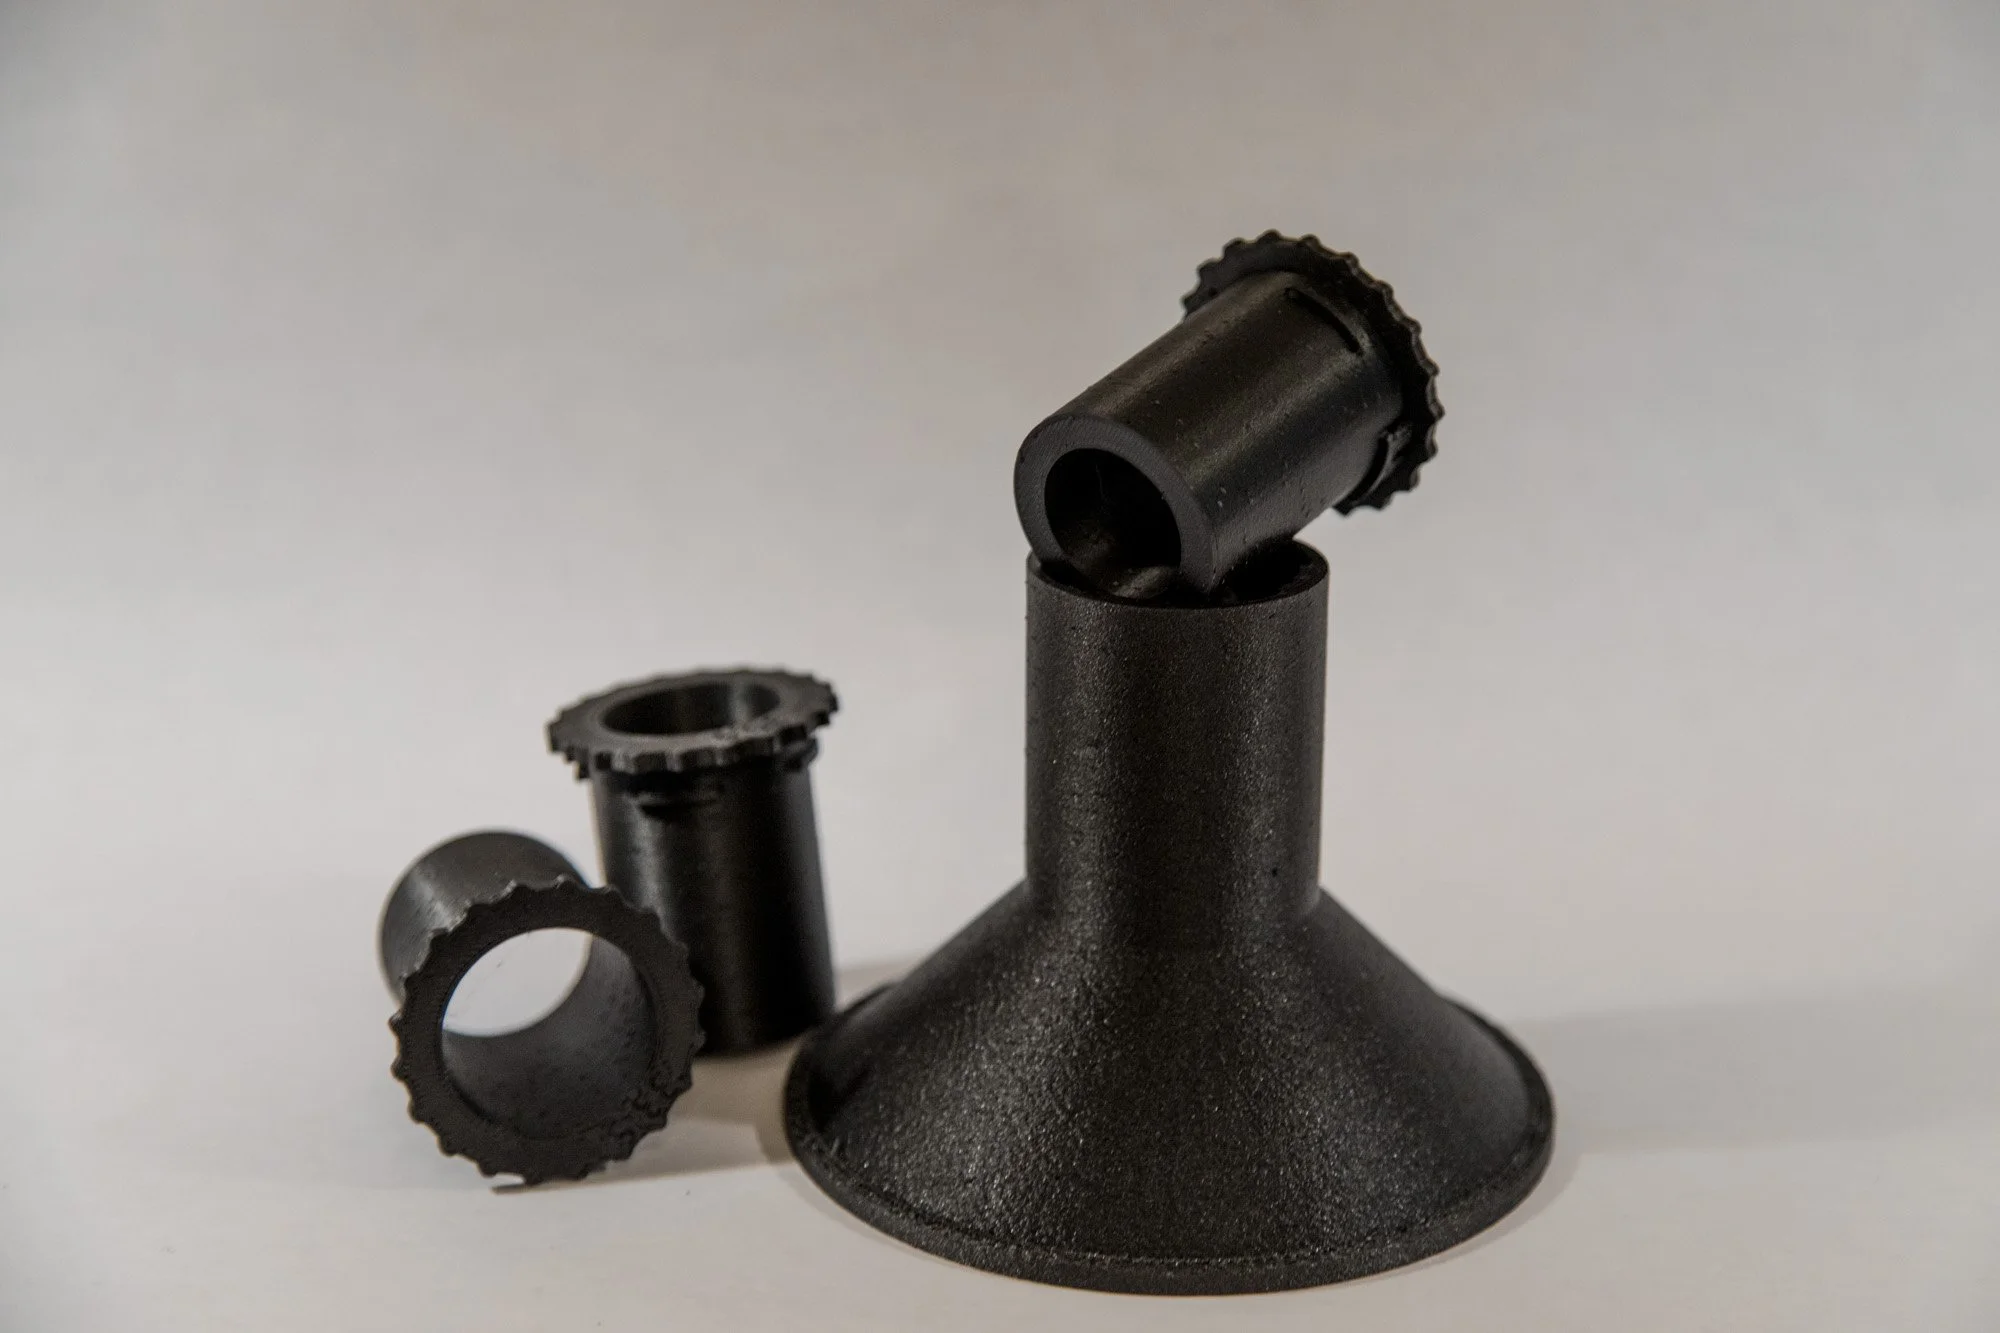 Image 5 of 12
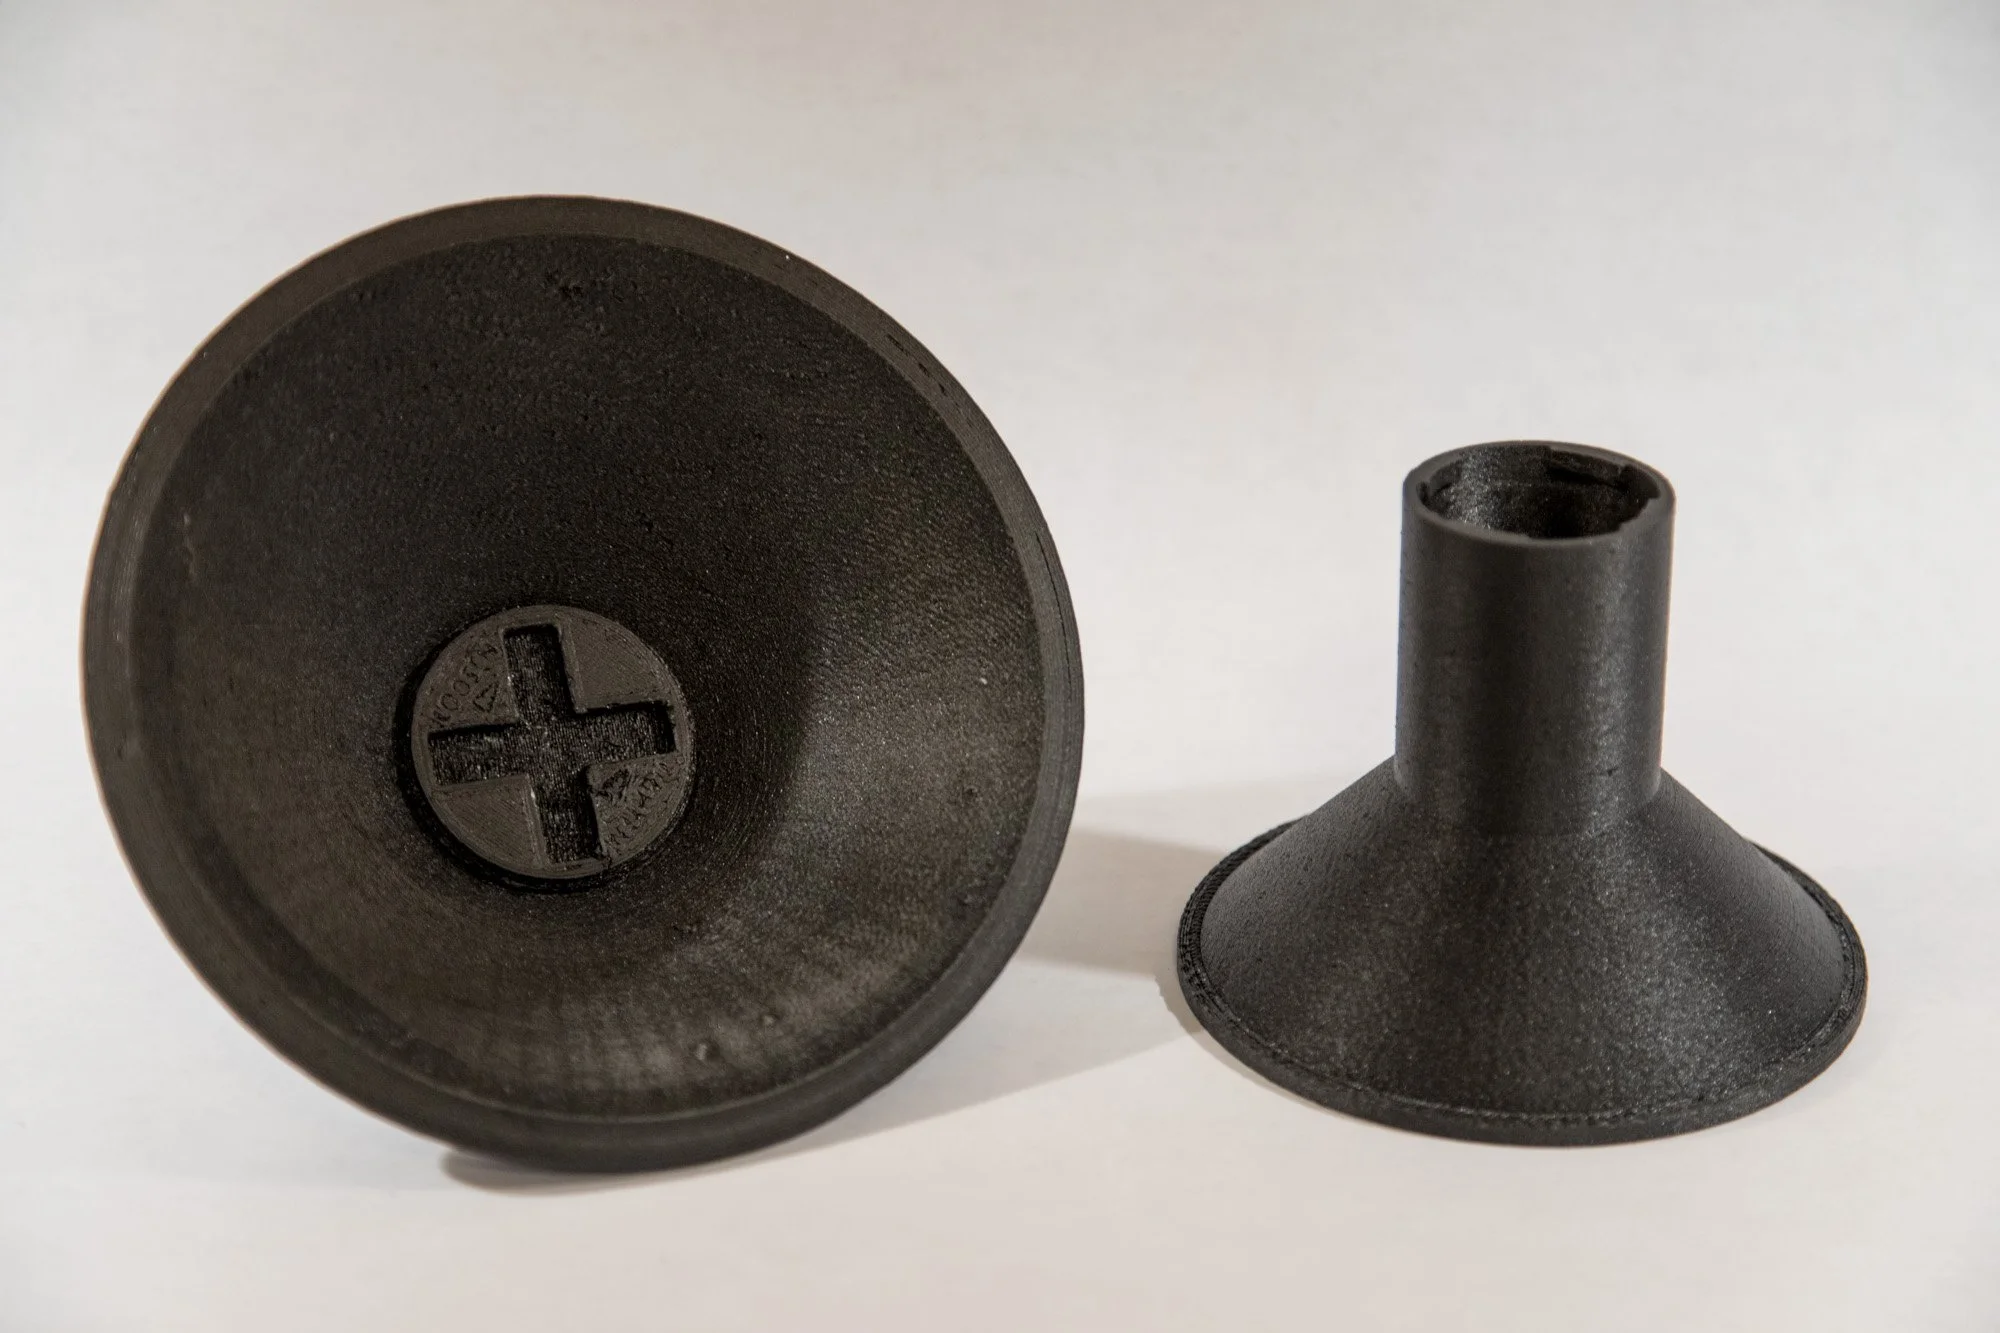 Image 6 of 12
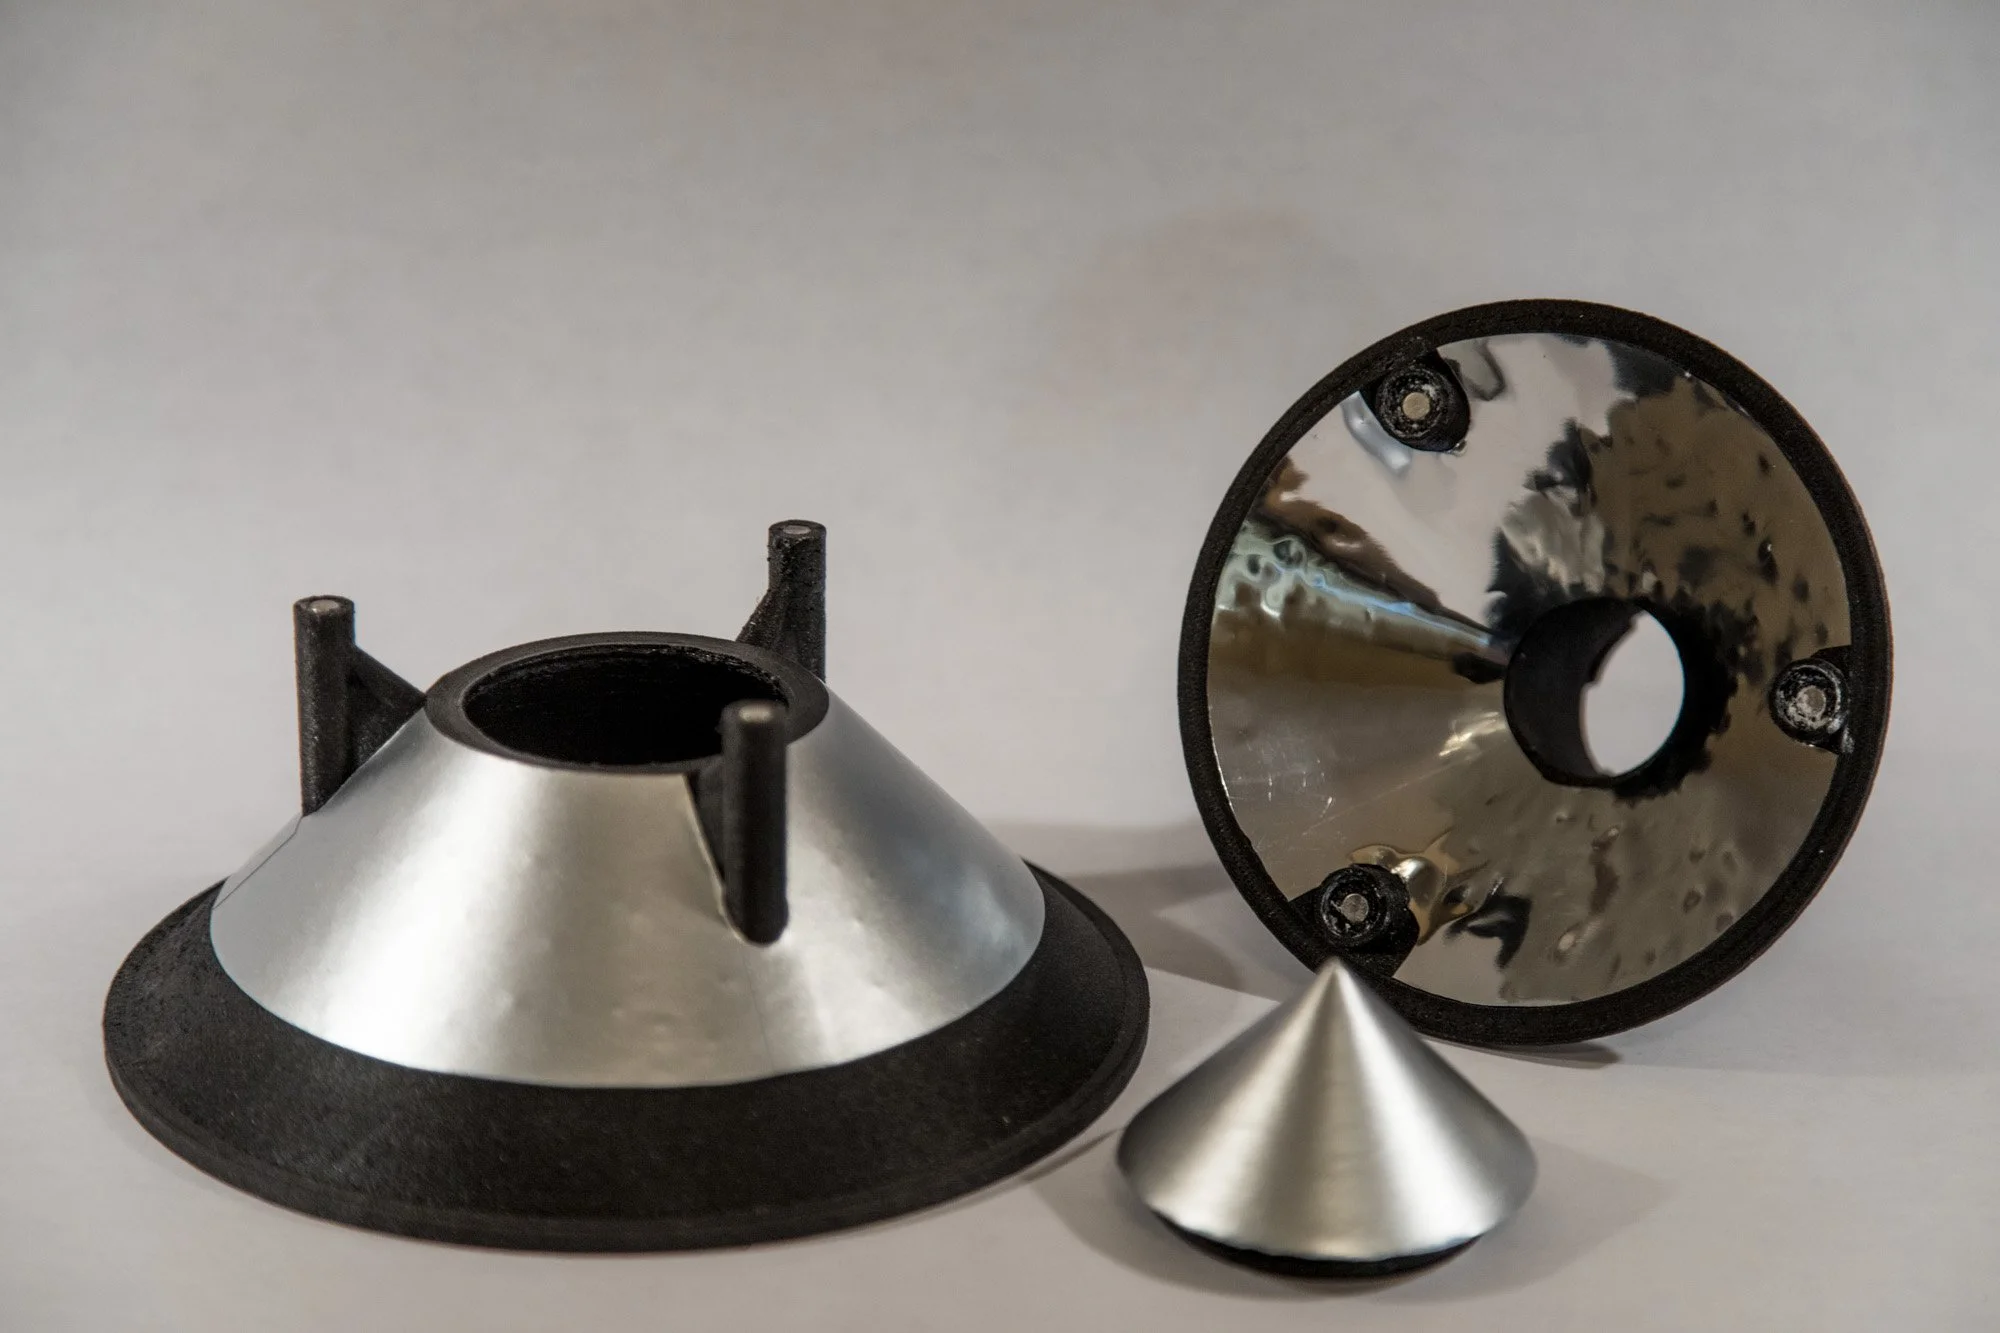 Image 7 of 12
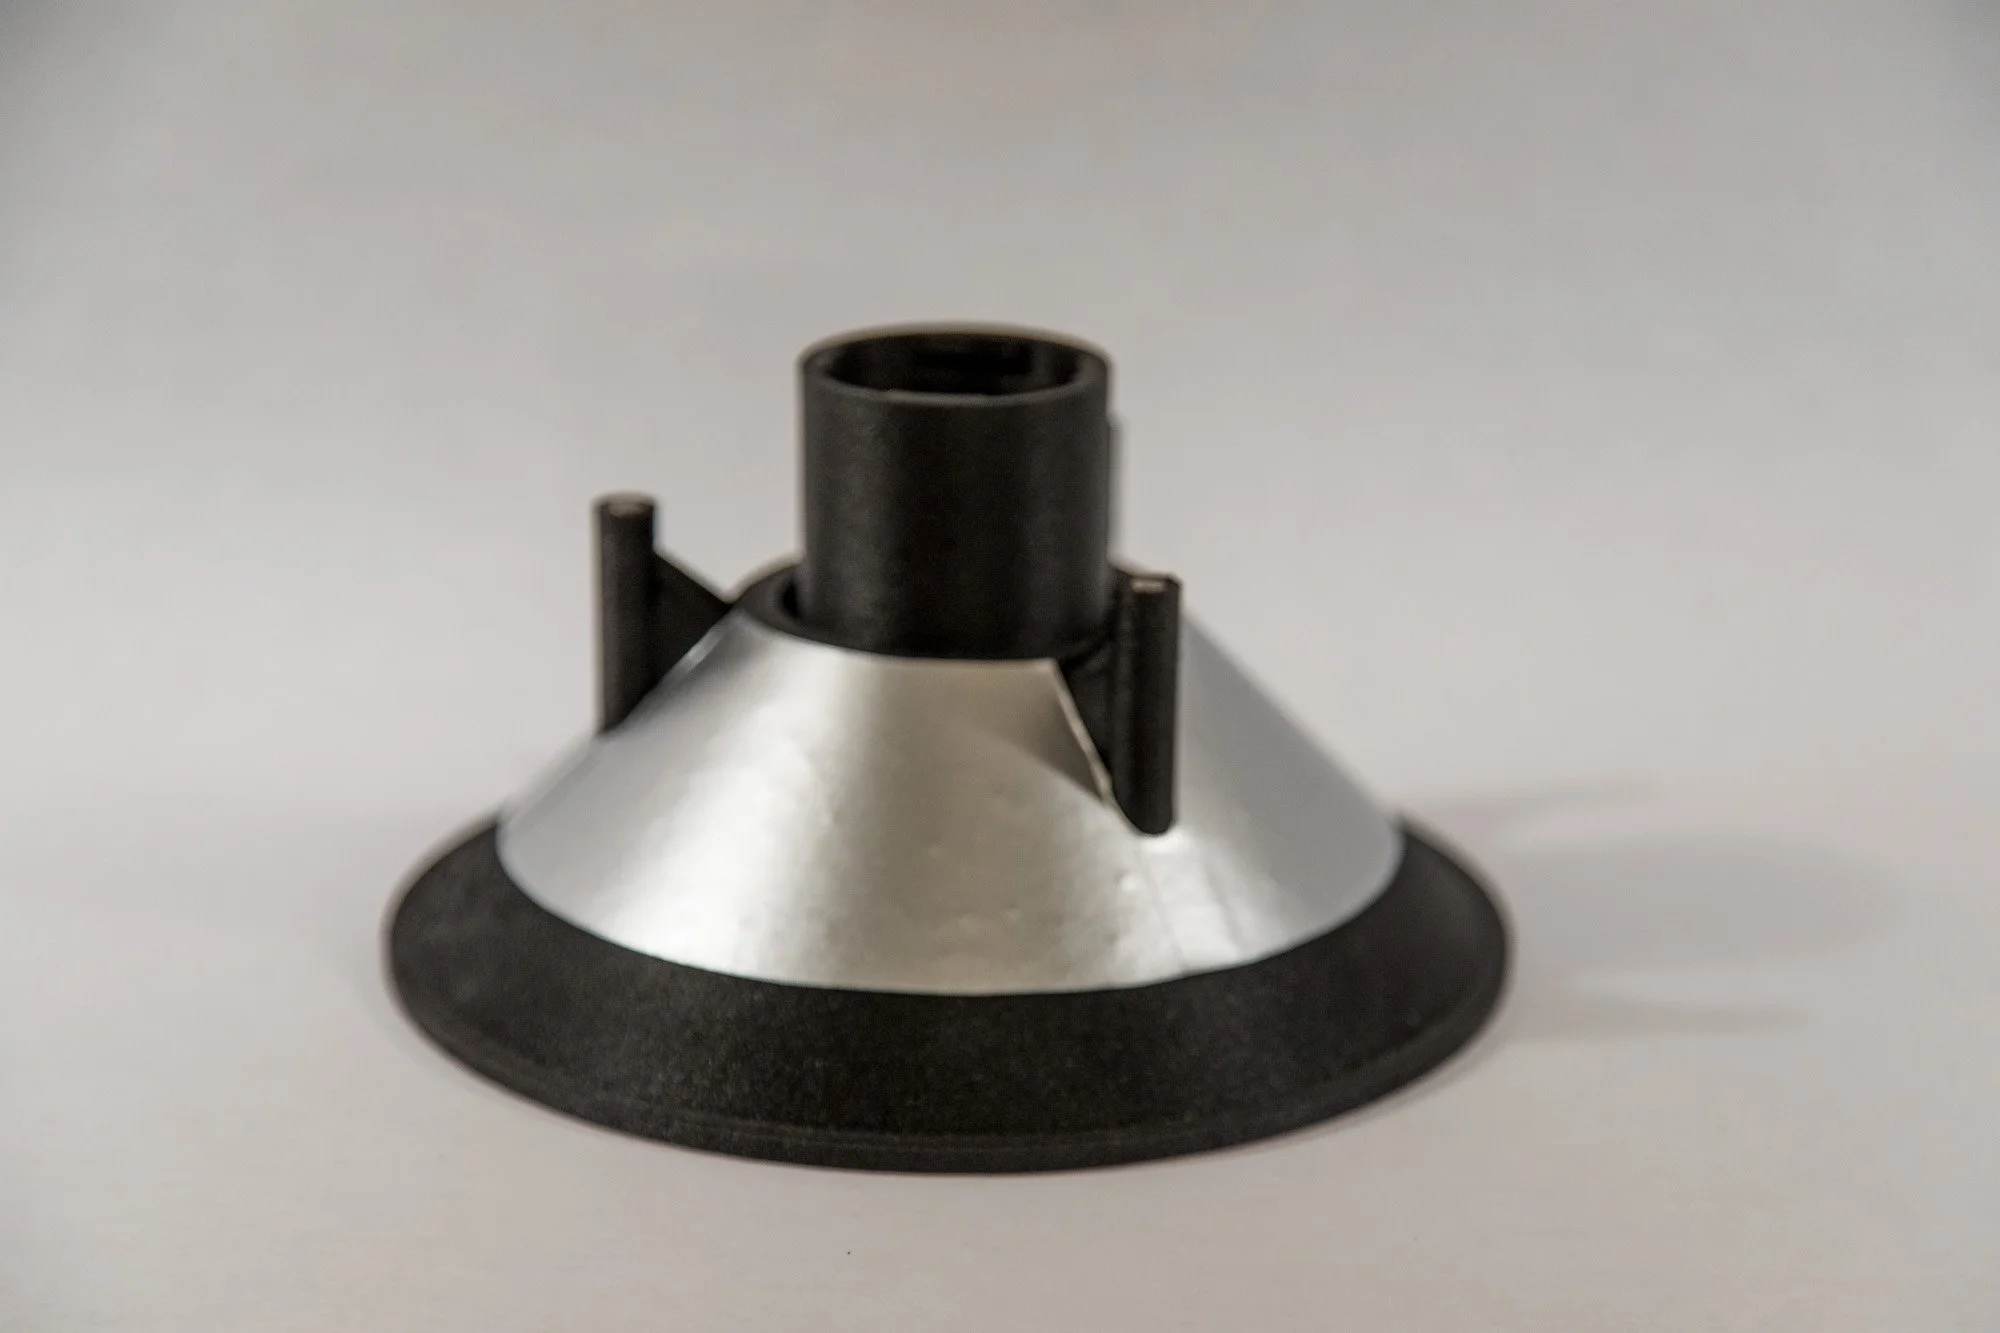 Image 8 of 12
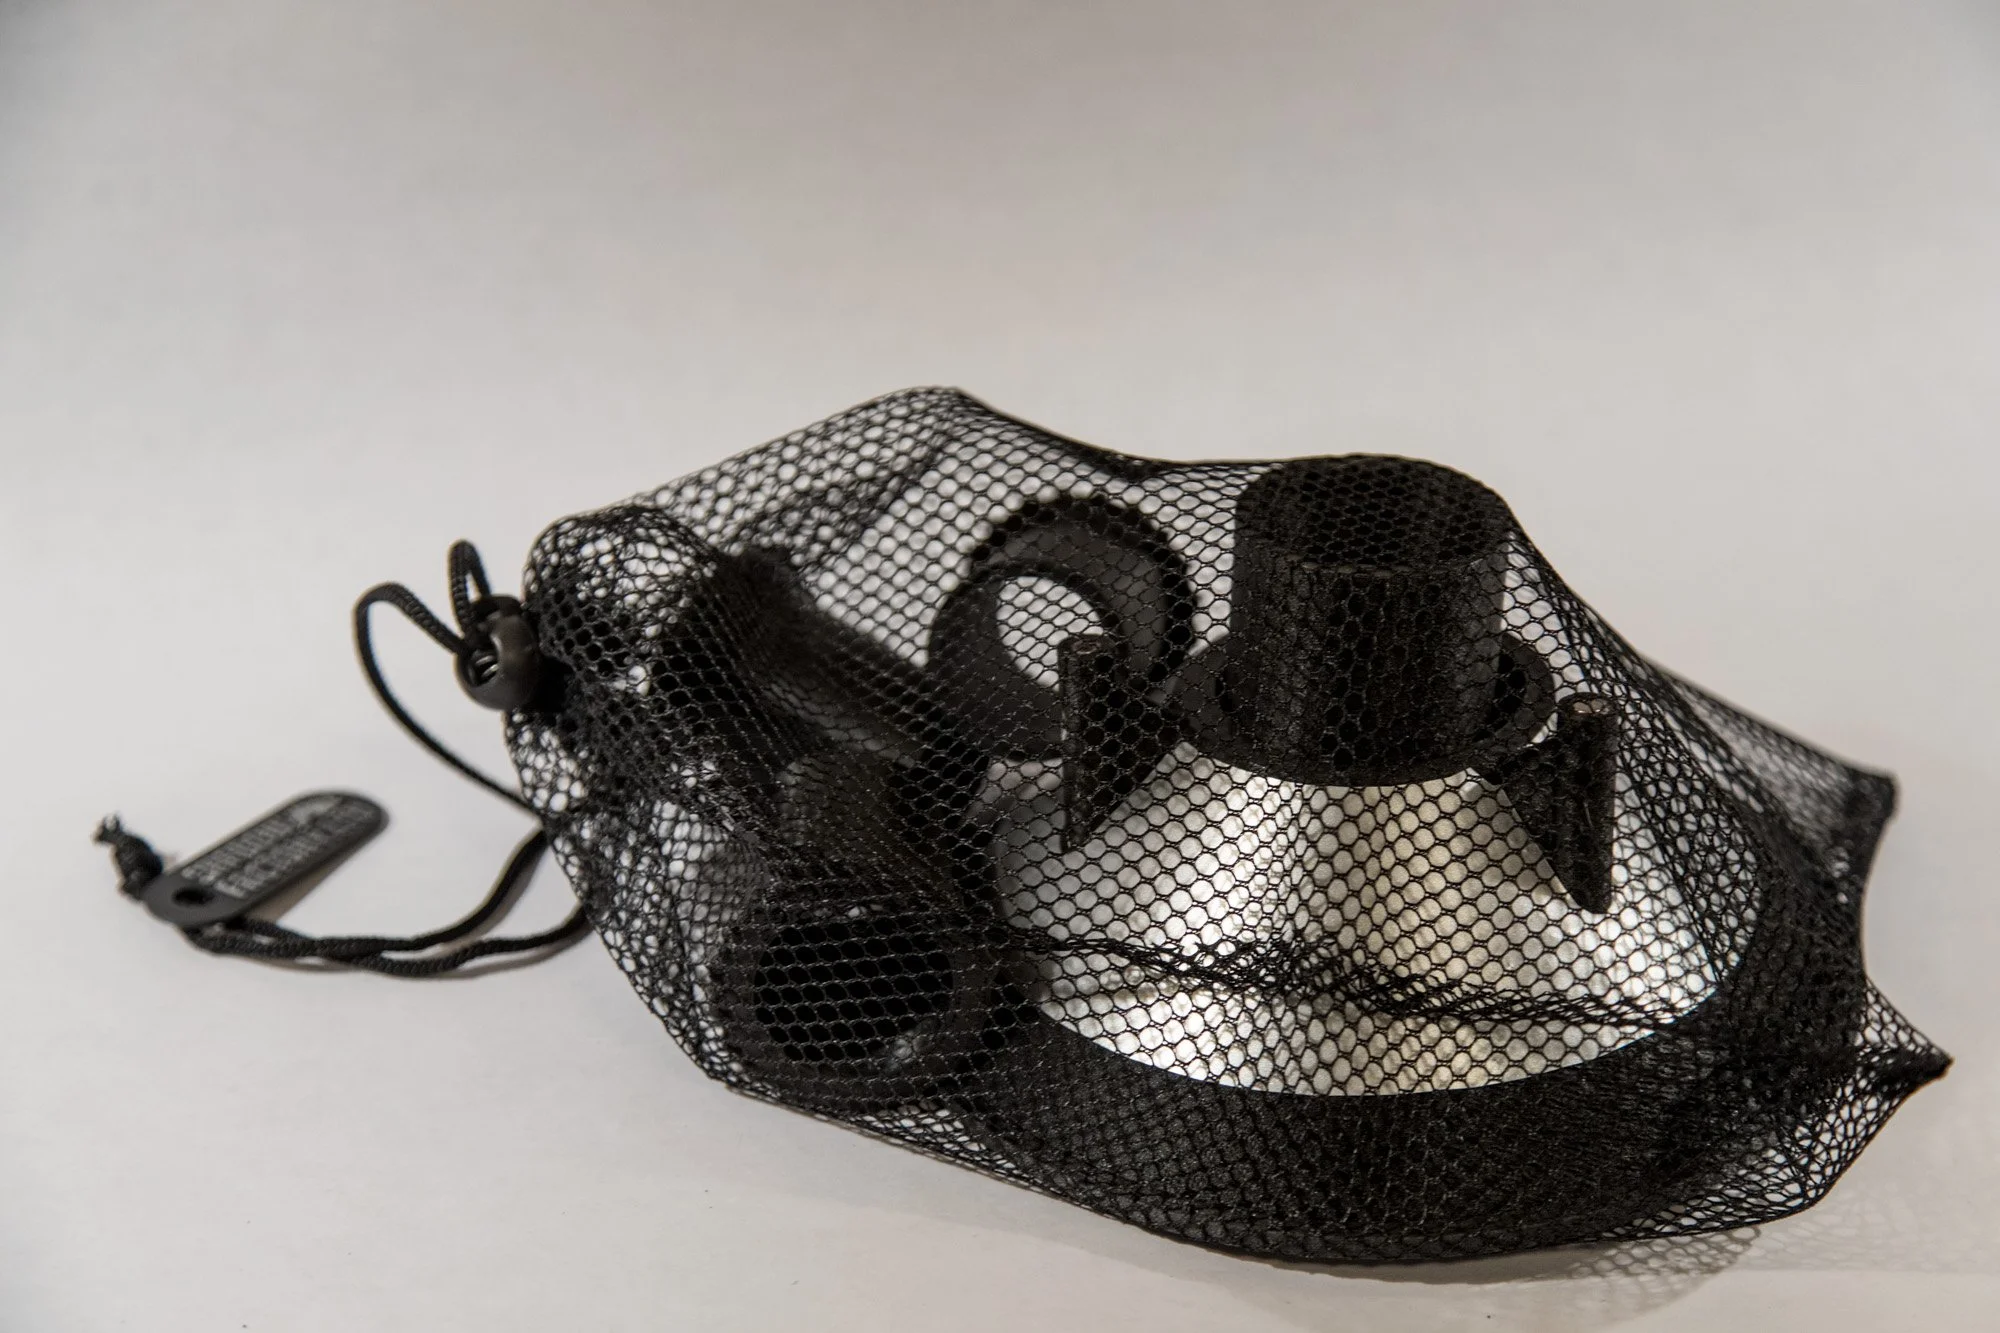 Image 9 of 12
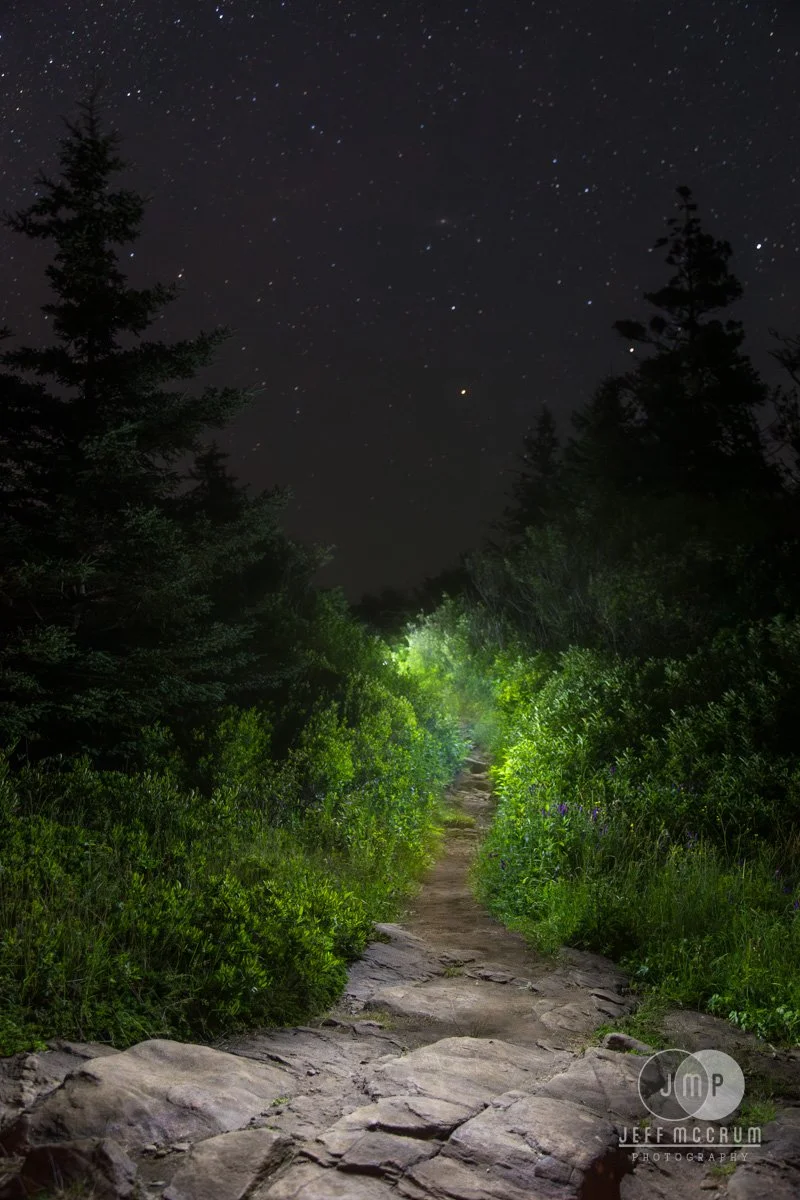 Image 10 of 12
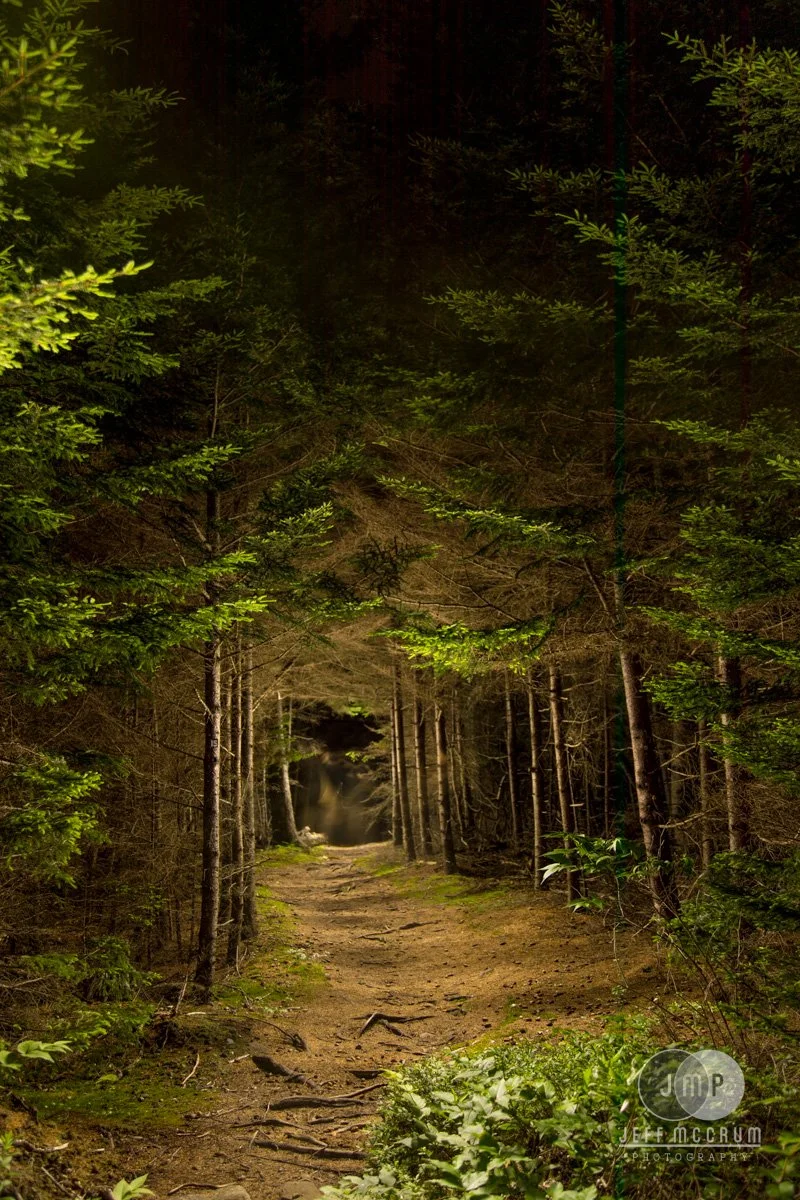 Image 11 of 12
 Image 12 of 12